Demo:
Capabilities
- Individual control of 88 keys
- 255 Levels of volume modulation using PWM
- Converts MIDI to compact 4 byte package to increase data transmission speed
- Cascading series of Queues to ensure notes are timed properly
Background
Like any good asian child, me and my sister played the piano since we were young at the insistence of our parents. Unlike my sister though, I stopped lessons at the end of elementary school and my skills have slowly declined since. Now she is head and shoulders ahead of me and this project is my attempt at leveling the field. Of course, mechanical hands can never match human ones, but I have put in effort to make the gap as small as possible.
For those of you who want to build something similar, a BOM is provided here with the costs I paid for each part.
Planning
Since I am most comfortable with robotics, I started development by laying out the broad strokes concerning mechanisms and control hardware. Solenoids were the easy choice to press the piano keys but they were not without downsides. Solenoids are fast, powerful and the linear motion suits the project well. However solenoids also are power hungry, heavy, produce a loud clicking noise when bottoming out, and are expensive to buy. Regardless, the speed and lack of rotational motion were too important to pass on so a lot of this project became about mitigating the downsides of using solenoids.
JF1039-B Solenoids
An obvious problem arises, how do you control 88 solenoids at once? An arduino/raspberry pi has around 16 output pins so wiring them directly is out of the question. I also want to drive the solenoids using PWM to control volume which further narrows the set of options available. After considerable thought, I believe the solution lies in either a shift register or I2C GPIO expander. Either approach would have worked fine, however I chose the I2C expander option due to a familiarity with the I2C protocol.
Mounting the device to the piano also merits a bit of planning which I did not initially do. Since I focused upon the electronics heavily, the chassis was neglected more than it should have been, leading to the ugly wooden spacer in version 1 found here. When I revisited the project for V2, I added an additional aluminum bar for strength and combined with formal 3D modeling classes, the body was much more efficient than before.
Custom PCB Work
There are pre-existing I2C GPIO expanders on the market in the form of neat little development boards which would suit most purposes. However the solenoids produce a noticeable buzzing noise when driven by PWM with the frequency of the operating frequency of the PWM generating chip. For example, common GPIO expanders like this one use the PCA9685 chipset with a PWM frequency of 1.6kHz, producing a 1.6kHz whine while the device is operational. This whine is not ideal and is what led me to proceed with a chipset from the same family (PCA9635) which offers up to 97kHz frequency which is far outside human hearing. With the help from online resources and an invaluable mentor from an online community, I was able to learn the design software EAGLE and send a design to JLCPCB which did much of the component assembly for me.
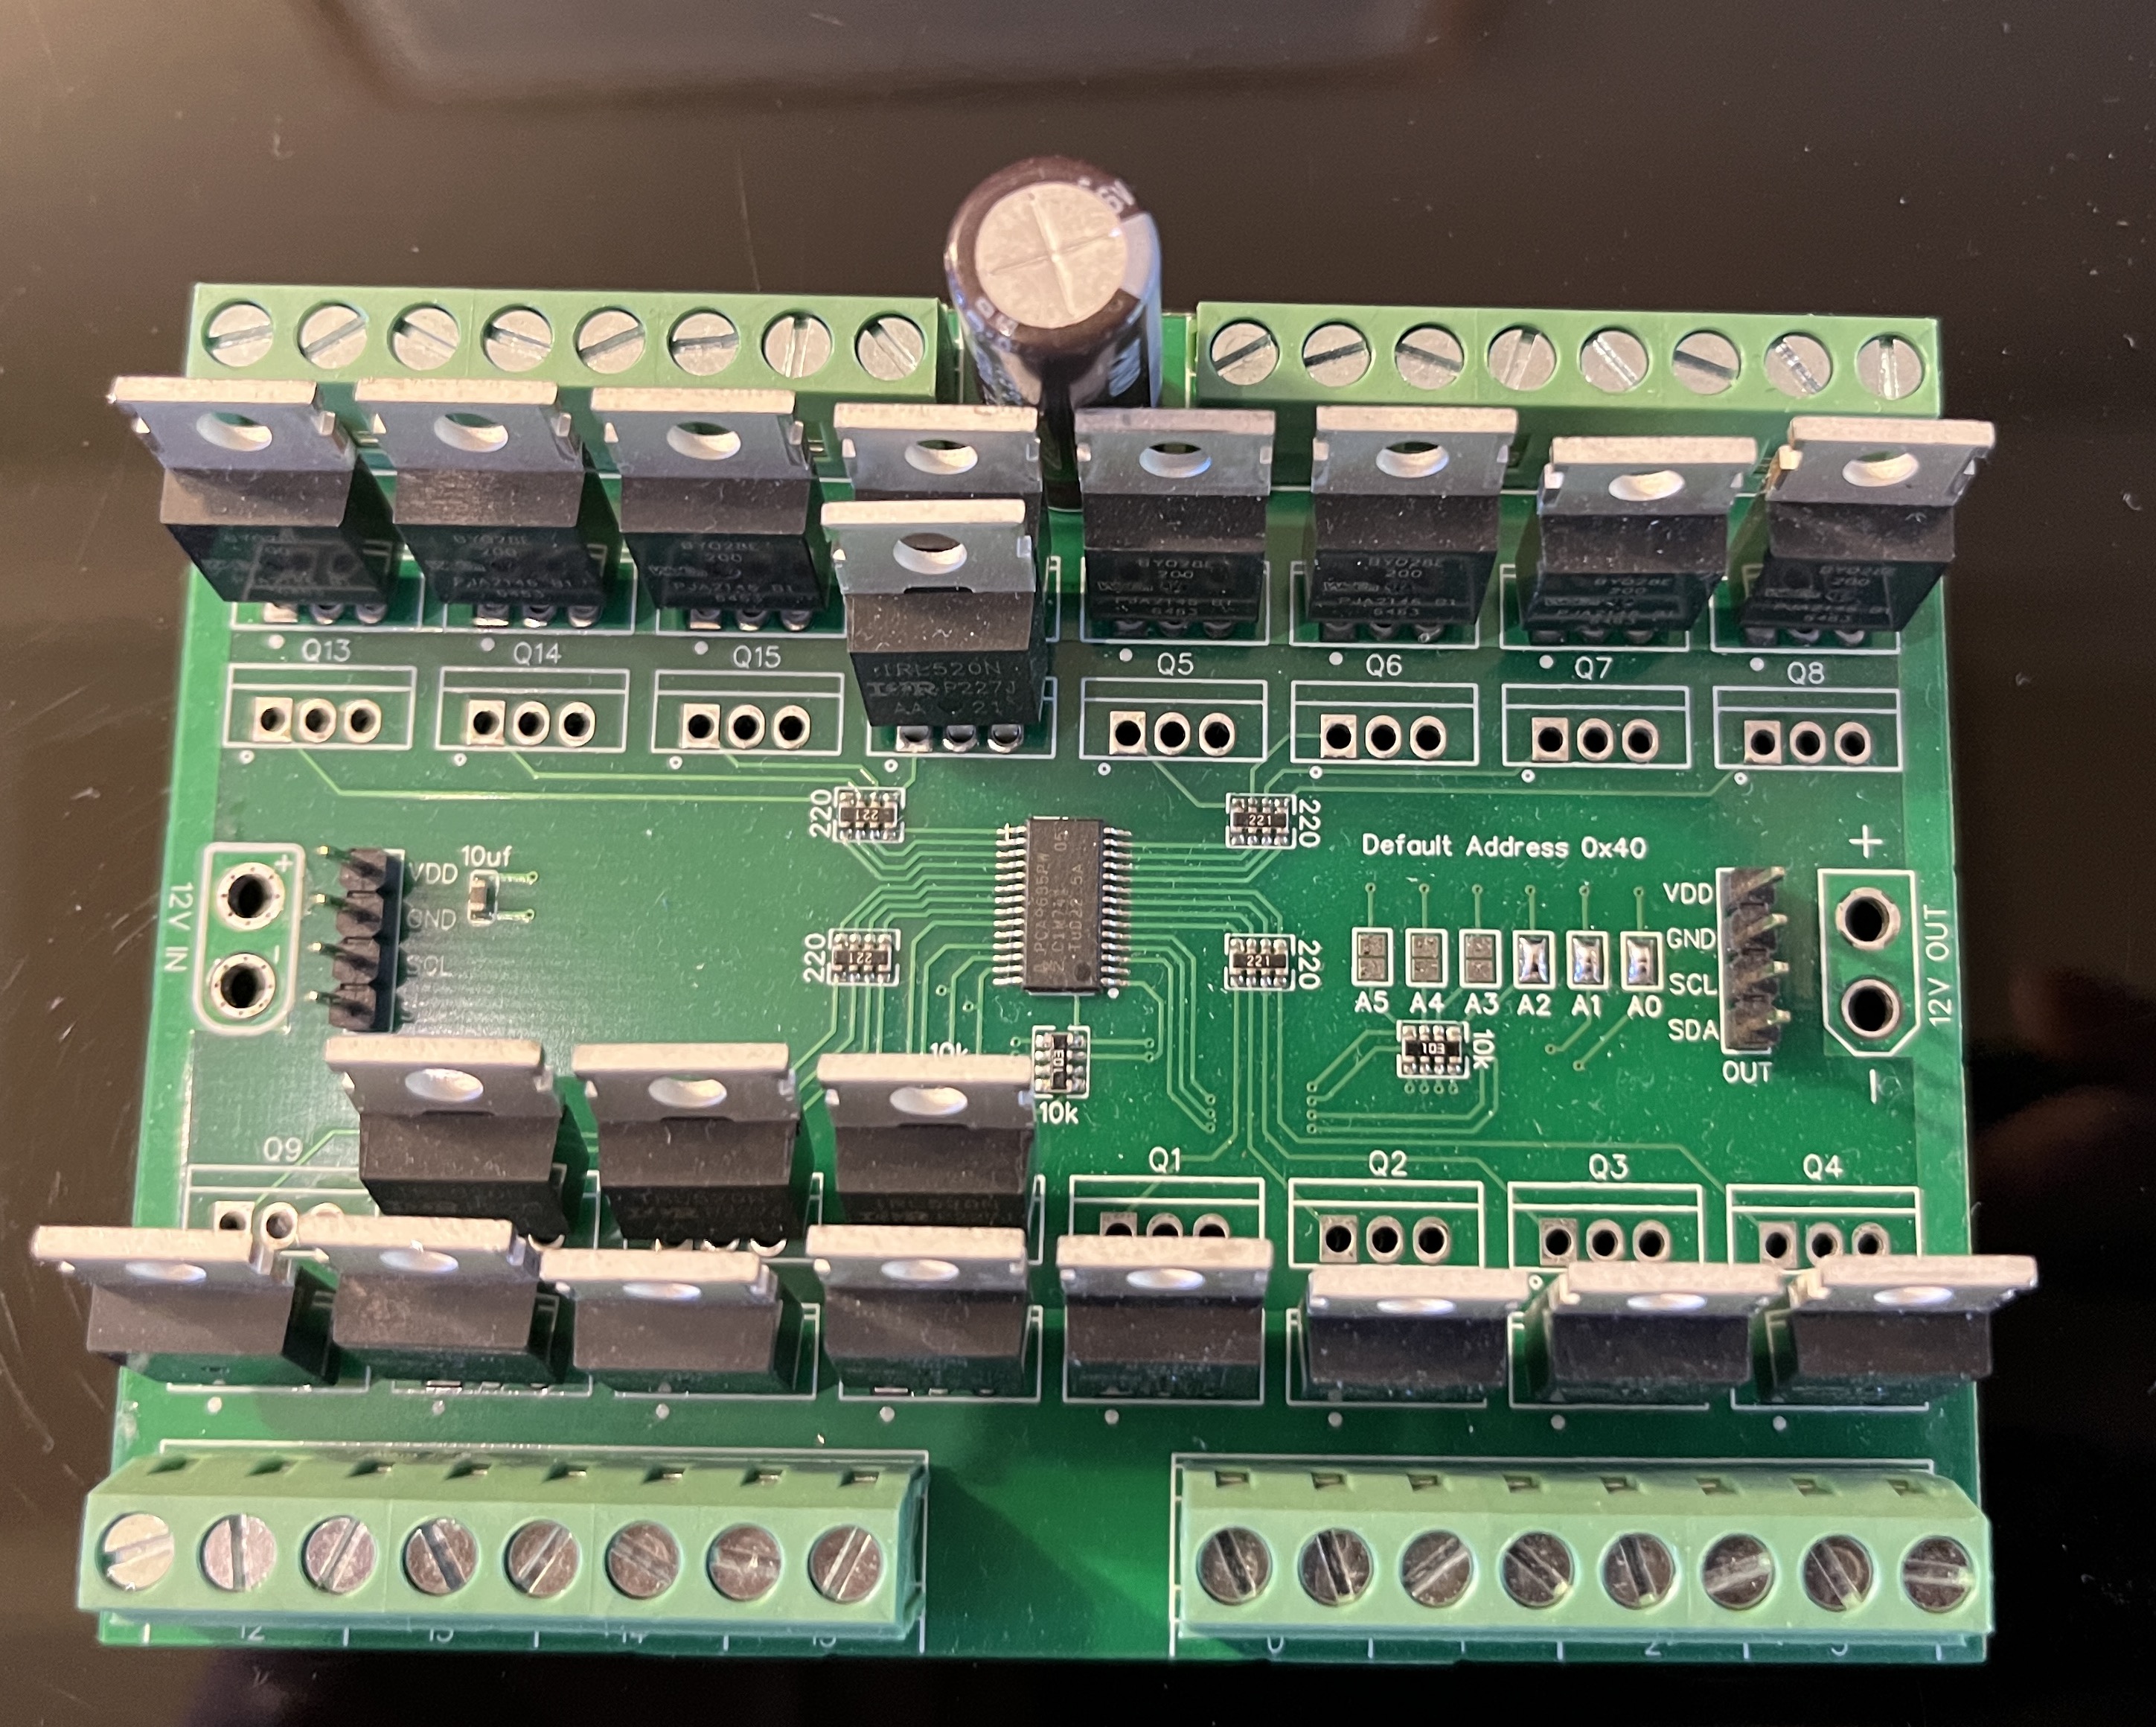
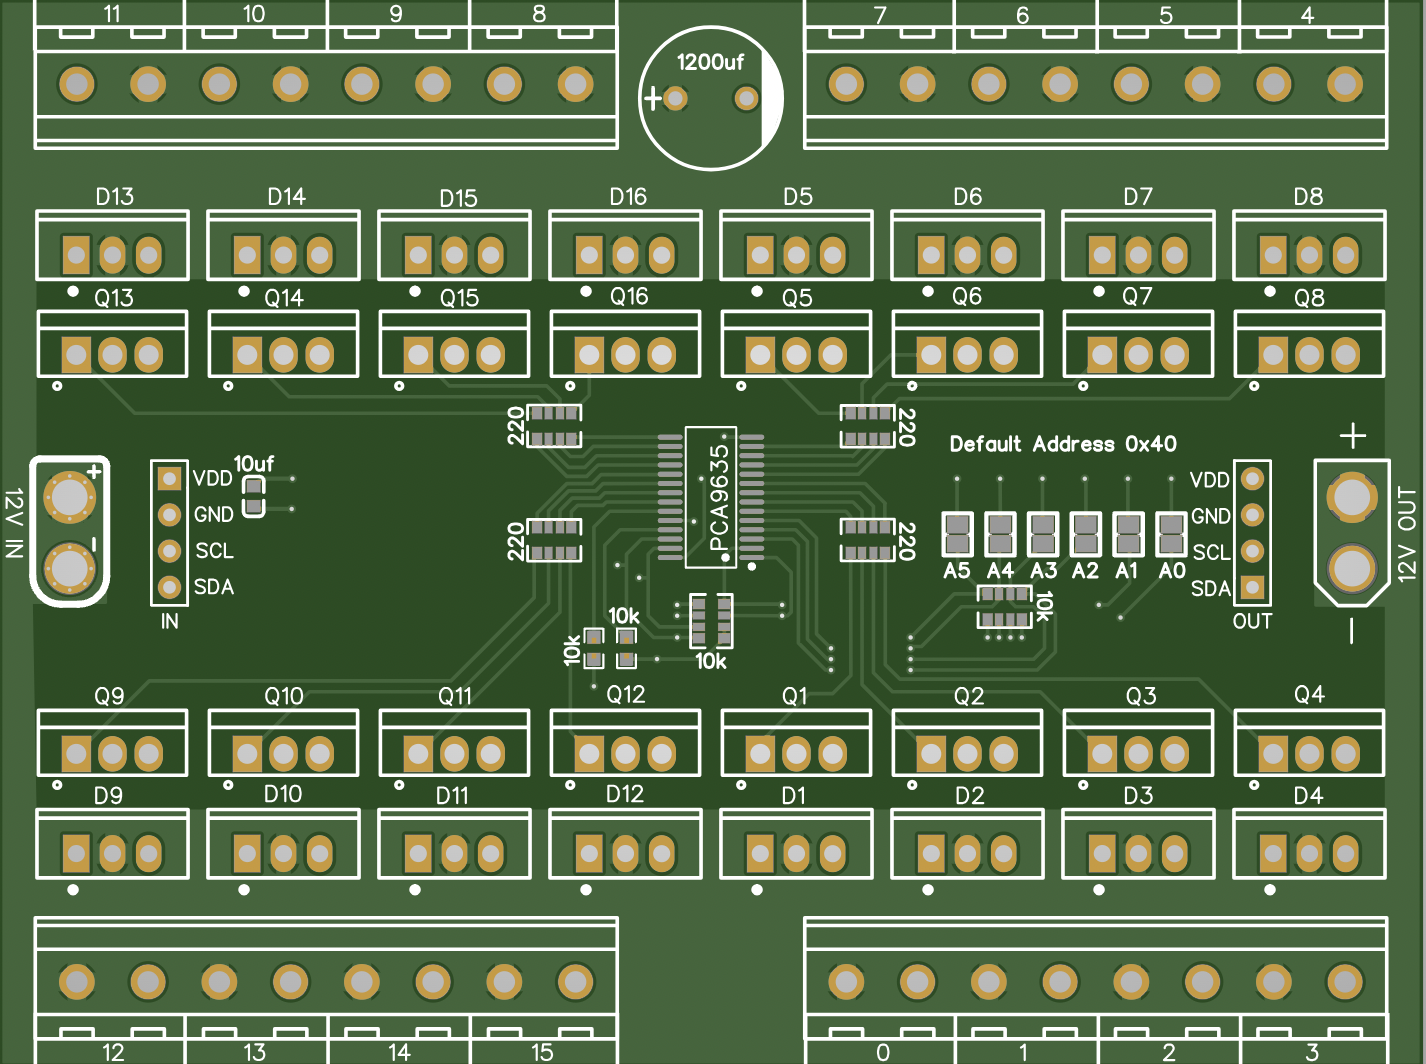
Final Physical Product, Final PCB Design
Electrical System
The heart of this project is an Arduino Mega doing all the scheduling and coordination. In hindsight this should have been on my local machine (laptop) but what’s done is done. Each custom PCB is daisy chained on the I2C bus with different addresses starting at 0x40 and ending at 0x47. A 24V, 20A power supply powers the solenoids through a distribution bus while a buck-boost converter drops the voltage down to 12 to power the logic and relay. In the future, I want to use the arduino to control a set of linear actuators for the pedal mechanism but that is outside of the time constraints for now. Currently the relay is used to hold power from the solenoids until after the PCBs have finished initializing so the solenoids don’t fire before logic is initialized.
I2C Daisy chained boards
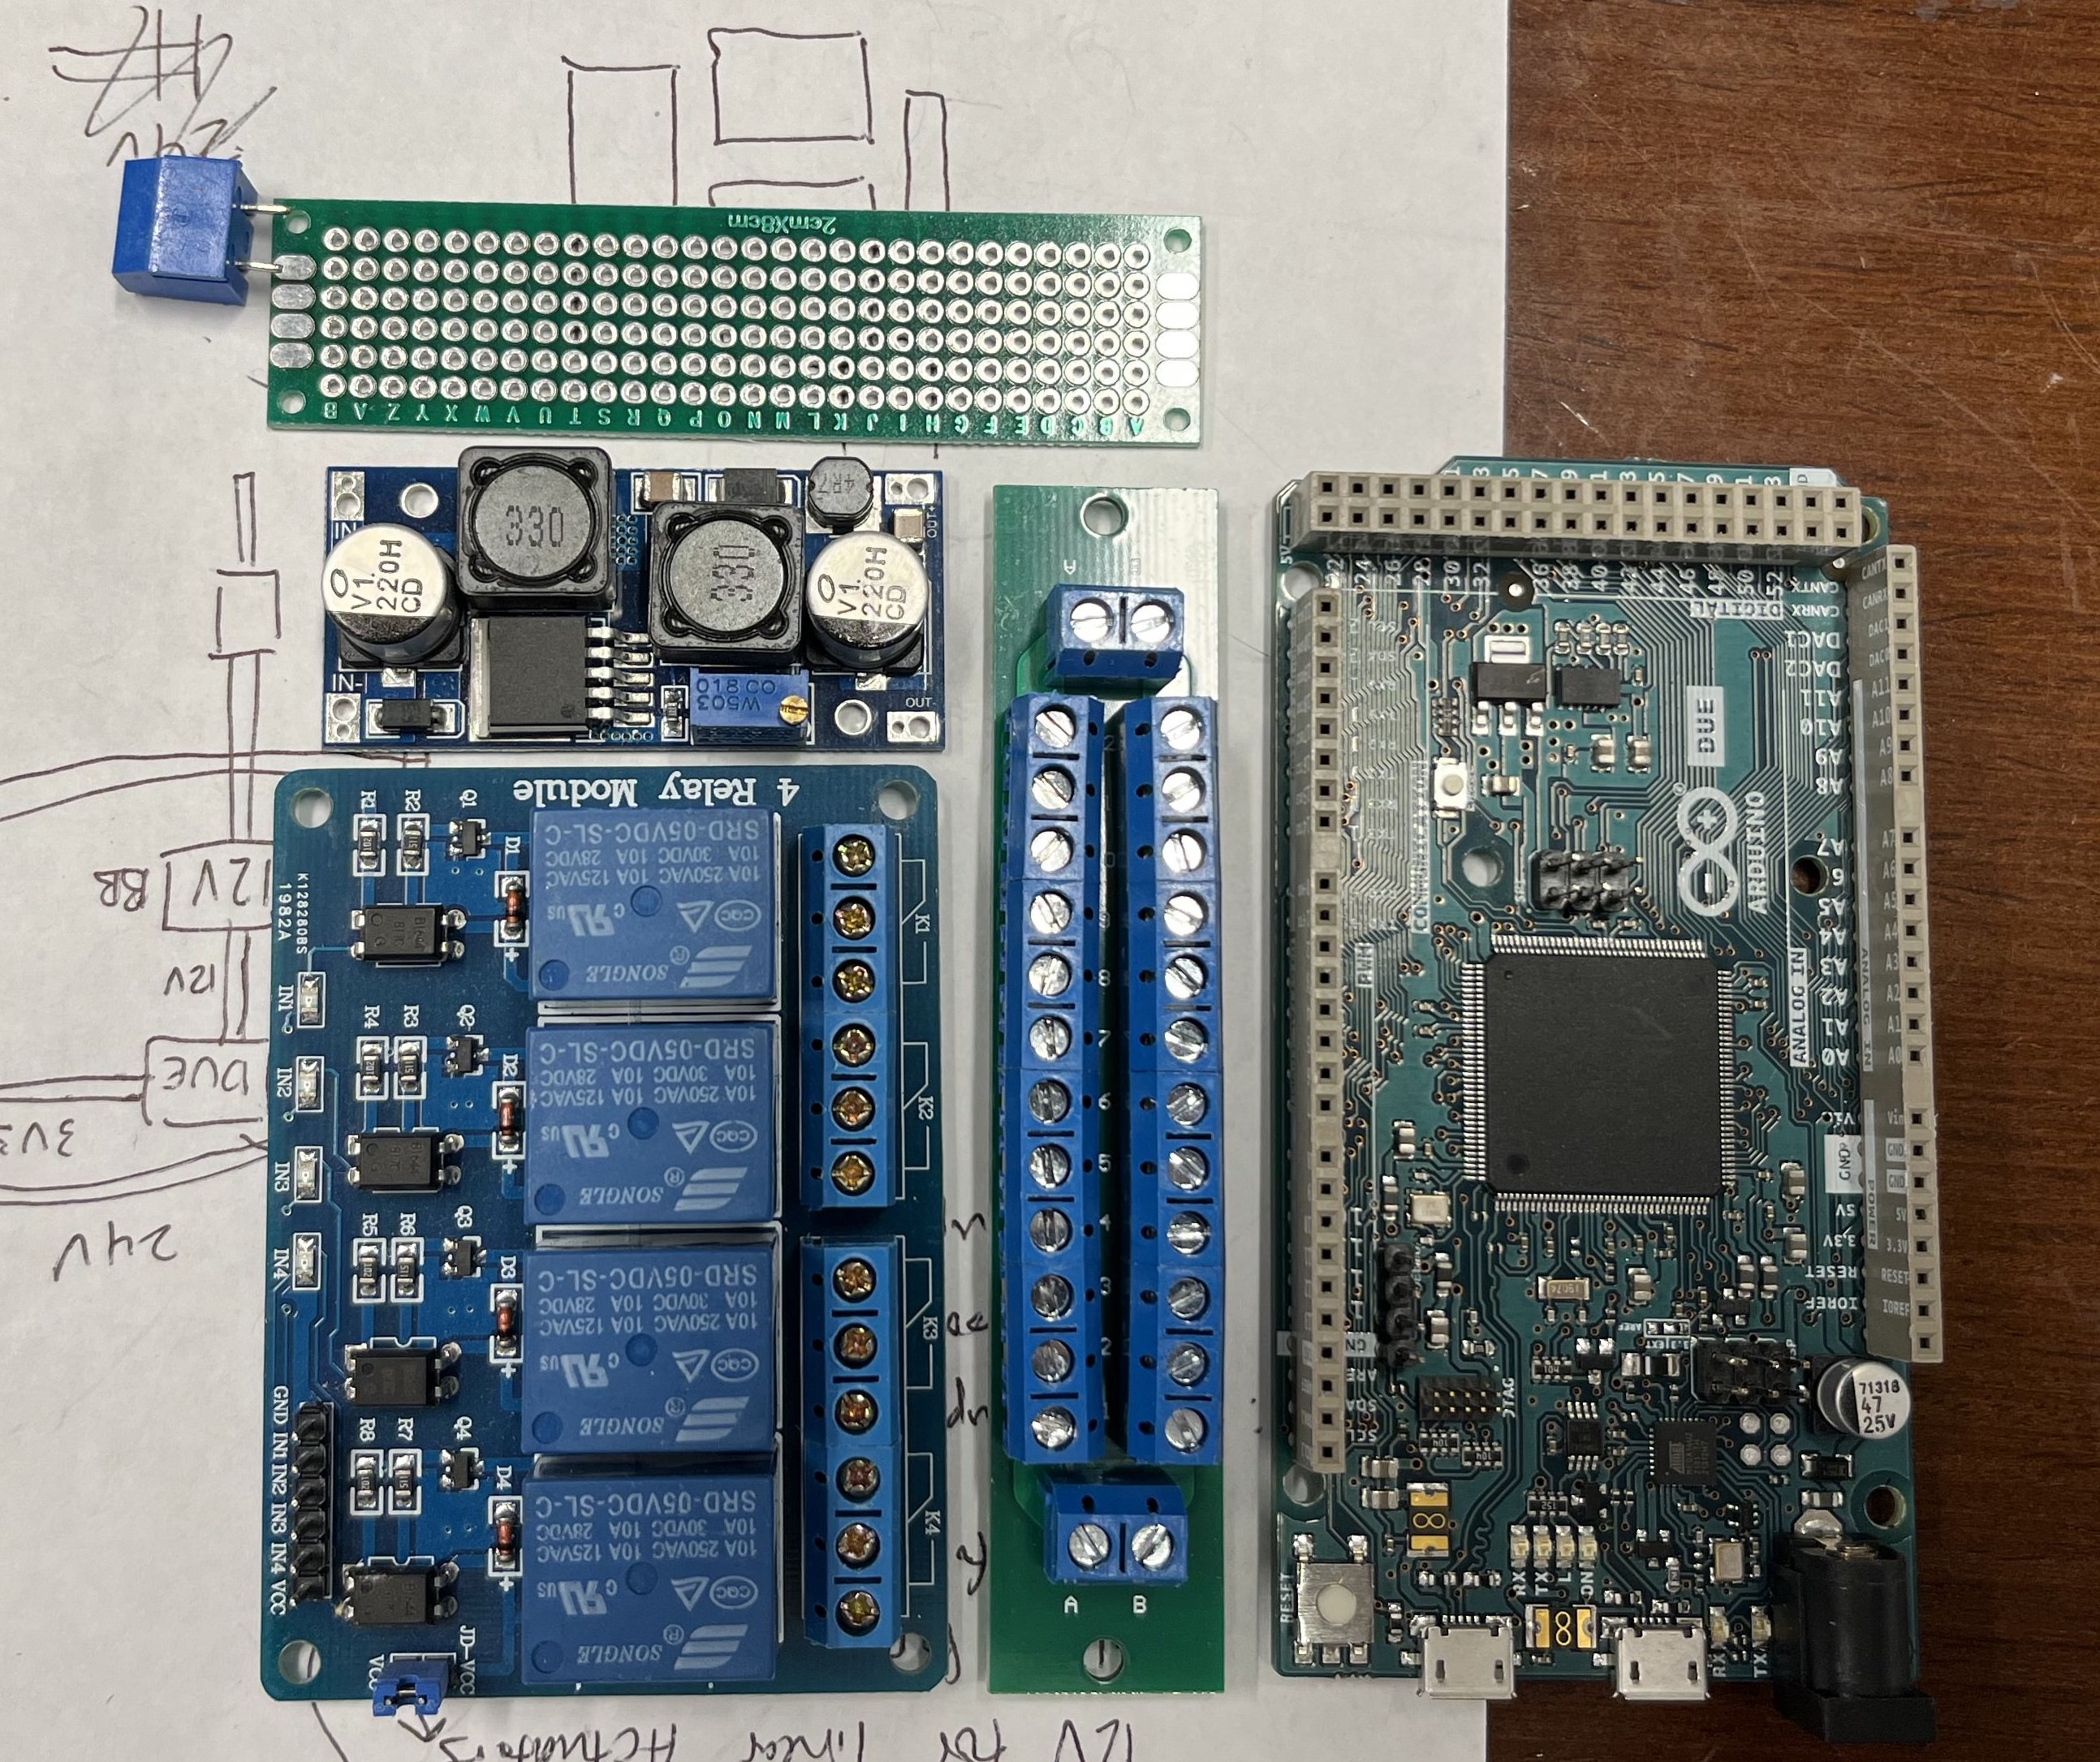
List of electronics
Chassis Construction
The entire design is based upon 2 long horizontal 20x20mm aluminum T bar extrusions that span the length of the piano. The T slots allow my 3d prints to slide onto the rails, each of which carries 1 full octave of notes or 12 solenoids. The spacing is extremly tight as one solenoid is about 1mm thinner than a white key, demanding high precision and low tolerences. All of this was designed in Fusion360 and while I am not a master at 3D modeling, I think this project helped me improve. Another thing learned is that every piano is different. I had to take literal hundreds of measurements as me and my 3D printer narrowed down proper dimensions and angles. The solenoids are also really heavy, with the 88 of them weighing over 20 pounds. This caused a bit of sag near the middle which I would like to address if there ever is a V3. Eventually though, I got 84/88 solenoids mounted on top of the piano with a basic platform above the solenoids for the electronics to rest upon
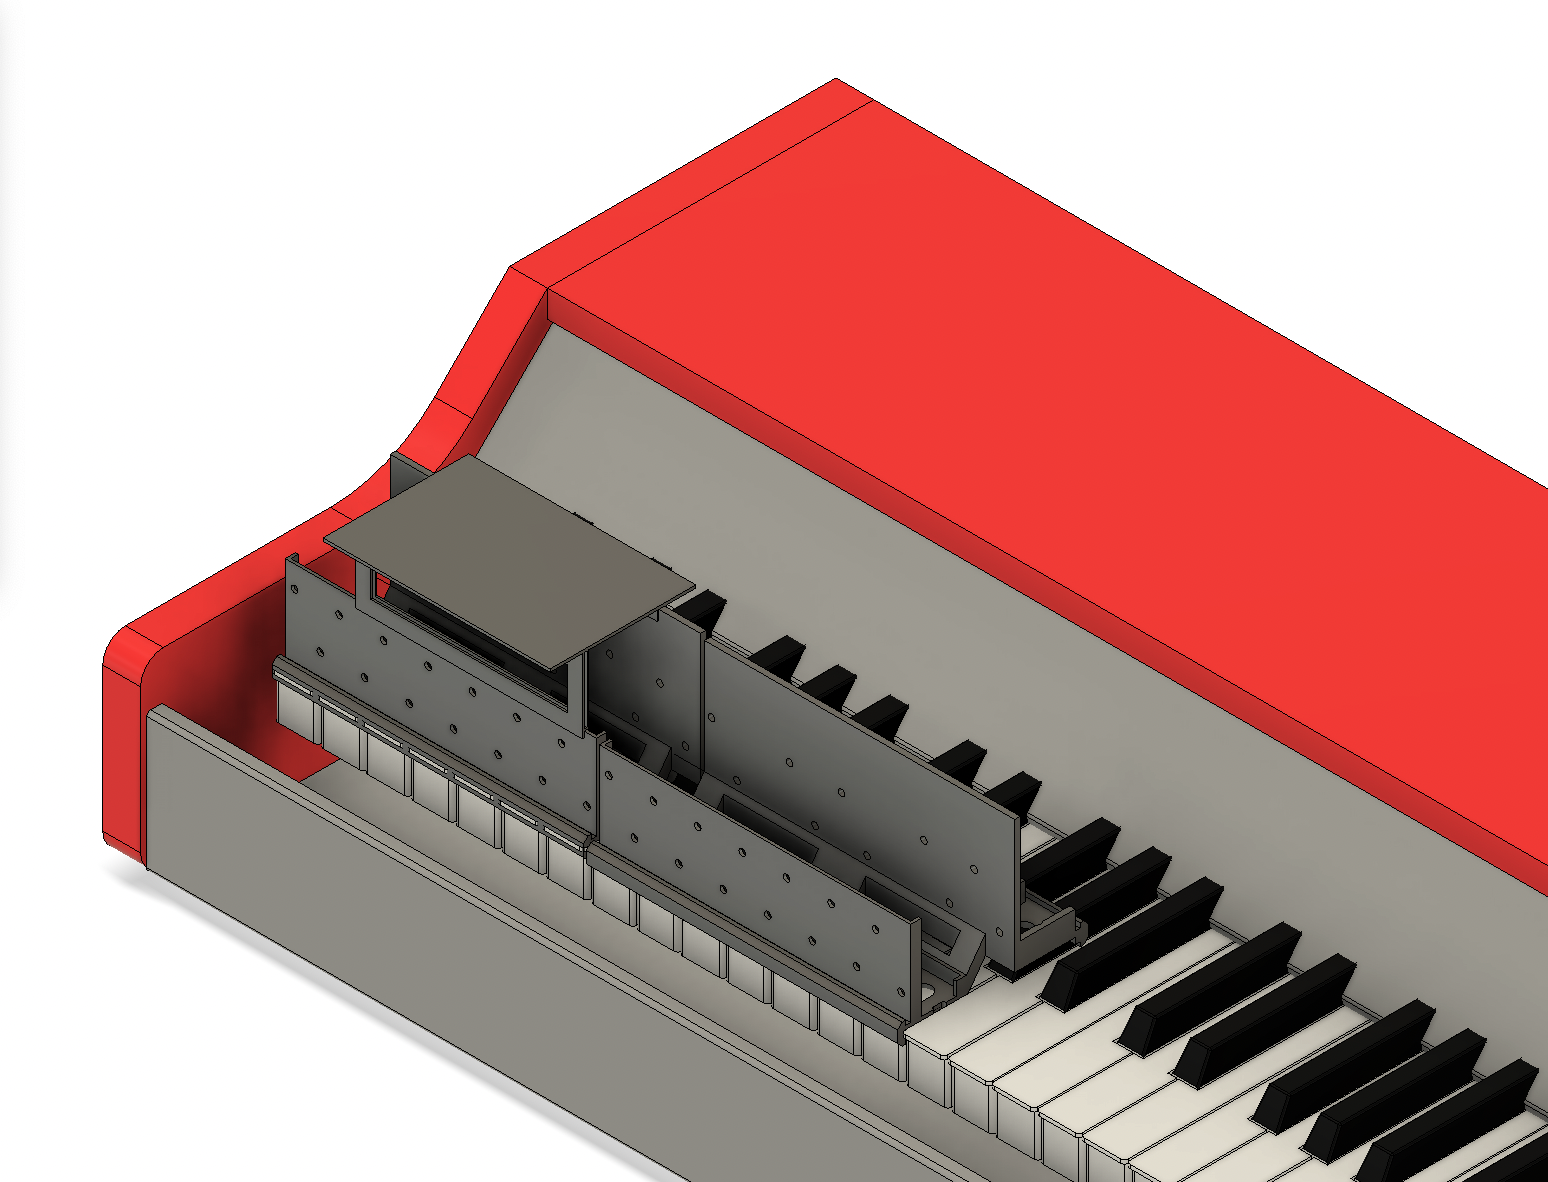
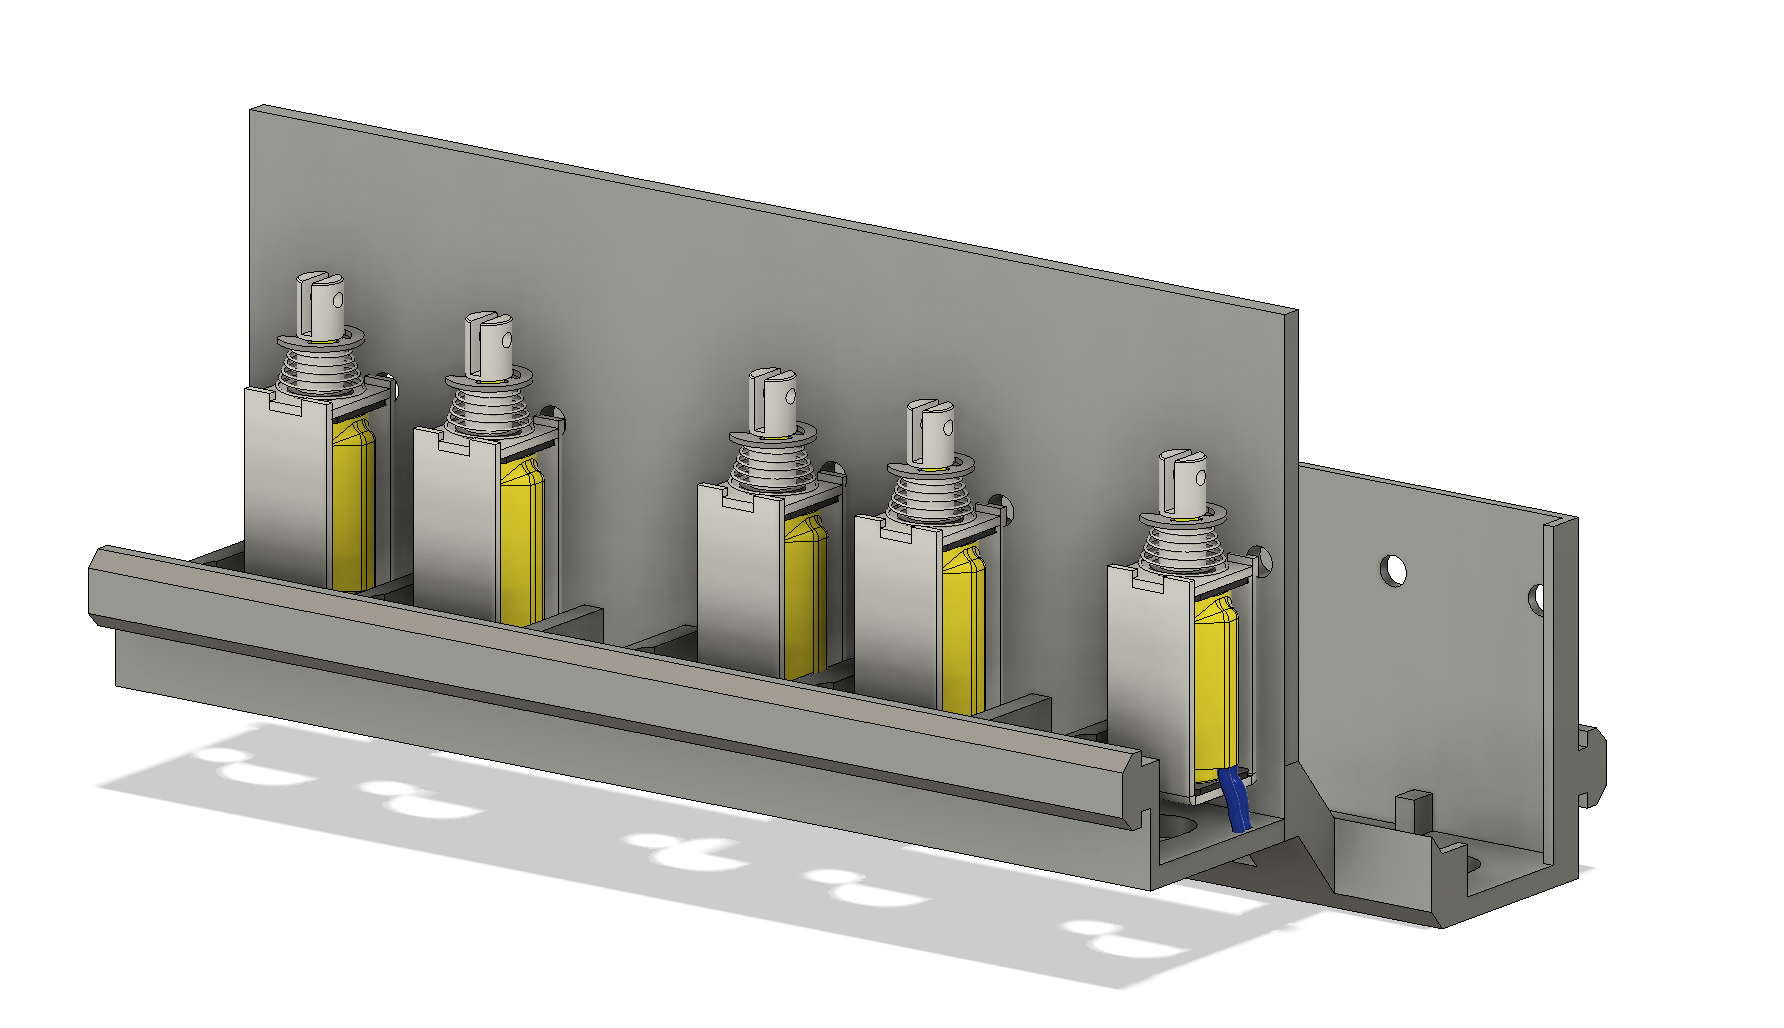
Assembly View, Individual Module
Code
Although I have little formal software engineering experience, I am quite proud of what I wrote for this project. The software is split into two parts, one half on my local machine and the other on the onboard arduino. On the computer side, A library (documentation found here is used to convert the MIDI to a CSV file which is then parsed through using Python to extract the important information: state, note, volume, time. The note value falls from 1-88, meaning it fits within 1 byte. Volume is from 0-255 meaning it is just outside 1 byte. State is binary, either an “on” event or “off” event, allowing it to be 1 bit. For the sake of ease though, I sent state as a byte, wasting some space. Since all events were bytes, they could be converted to an ASCII char and sent over USB serial to the arduino. A “noteEvent” would therefore look something like: !E~0. Using the timing given by the CSV file, I send the note commands over, delaying the amount specified.
Upon recieving a “noteEvent” I parsed the note and send it to a queue to play the note. It is incredibly important to know that the arduino is single threaded so there is no such thing as delaying in one part of the code and executing another part while waiting. This complicates the playing process massively but using a cascading set of queues along with implementing some pseudo multithreading, I just about got it done. The process of playing a note goes as follows. For the first 10ms, I play the note at full volume to break the static friction of the piano key. For the next 50-150ms this is when the PWM modulation comes in and the power used during this time determines the volume of the note. Finally once the solenoid bottoms out, the power is reduced to 1/4 since not much energy is require to keep the key pressed and the force of a solenoid increases with the square of distance to the end.
Conclusion
Thanks for reading this quite long writeup about my (current) favorite project. Big thanks to the pioneers Brandon Switzer, Likevvii, and jBassman on the Discord for helping out.

