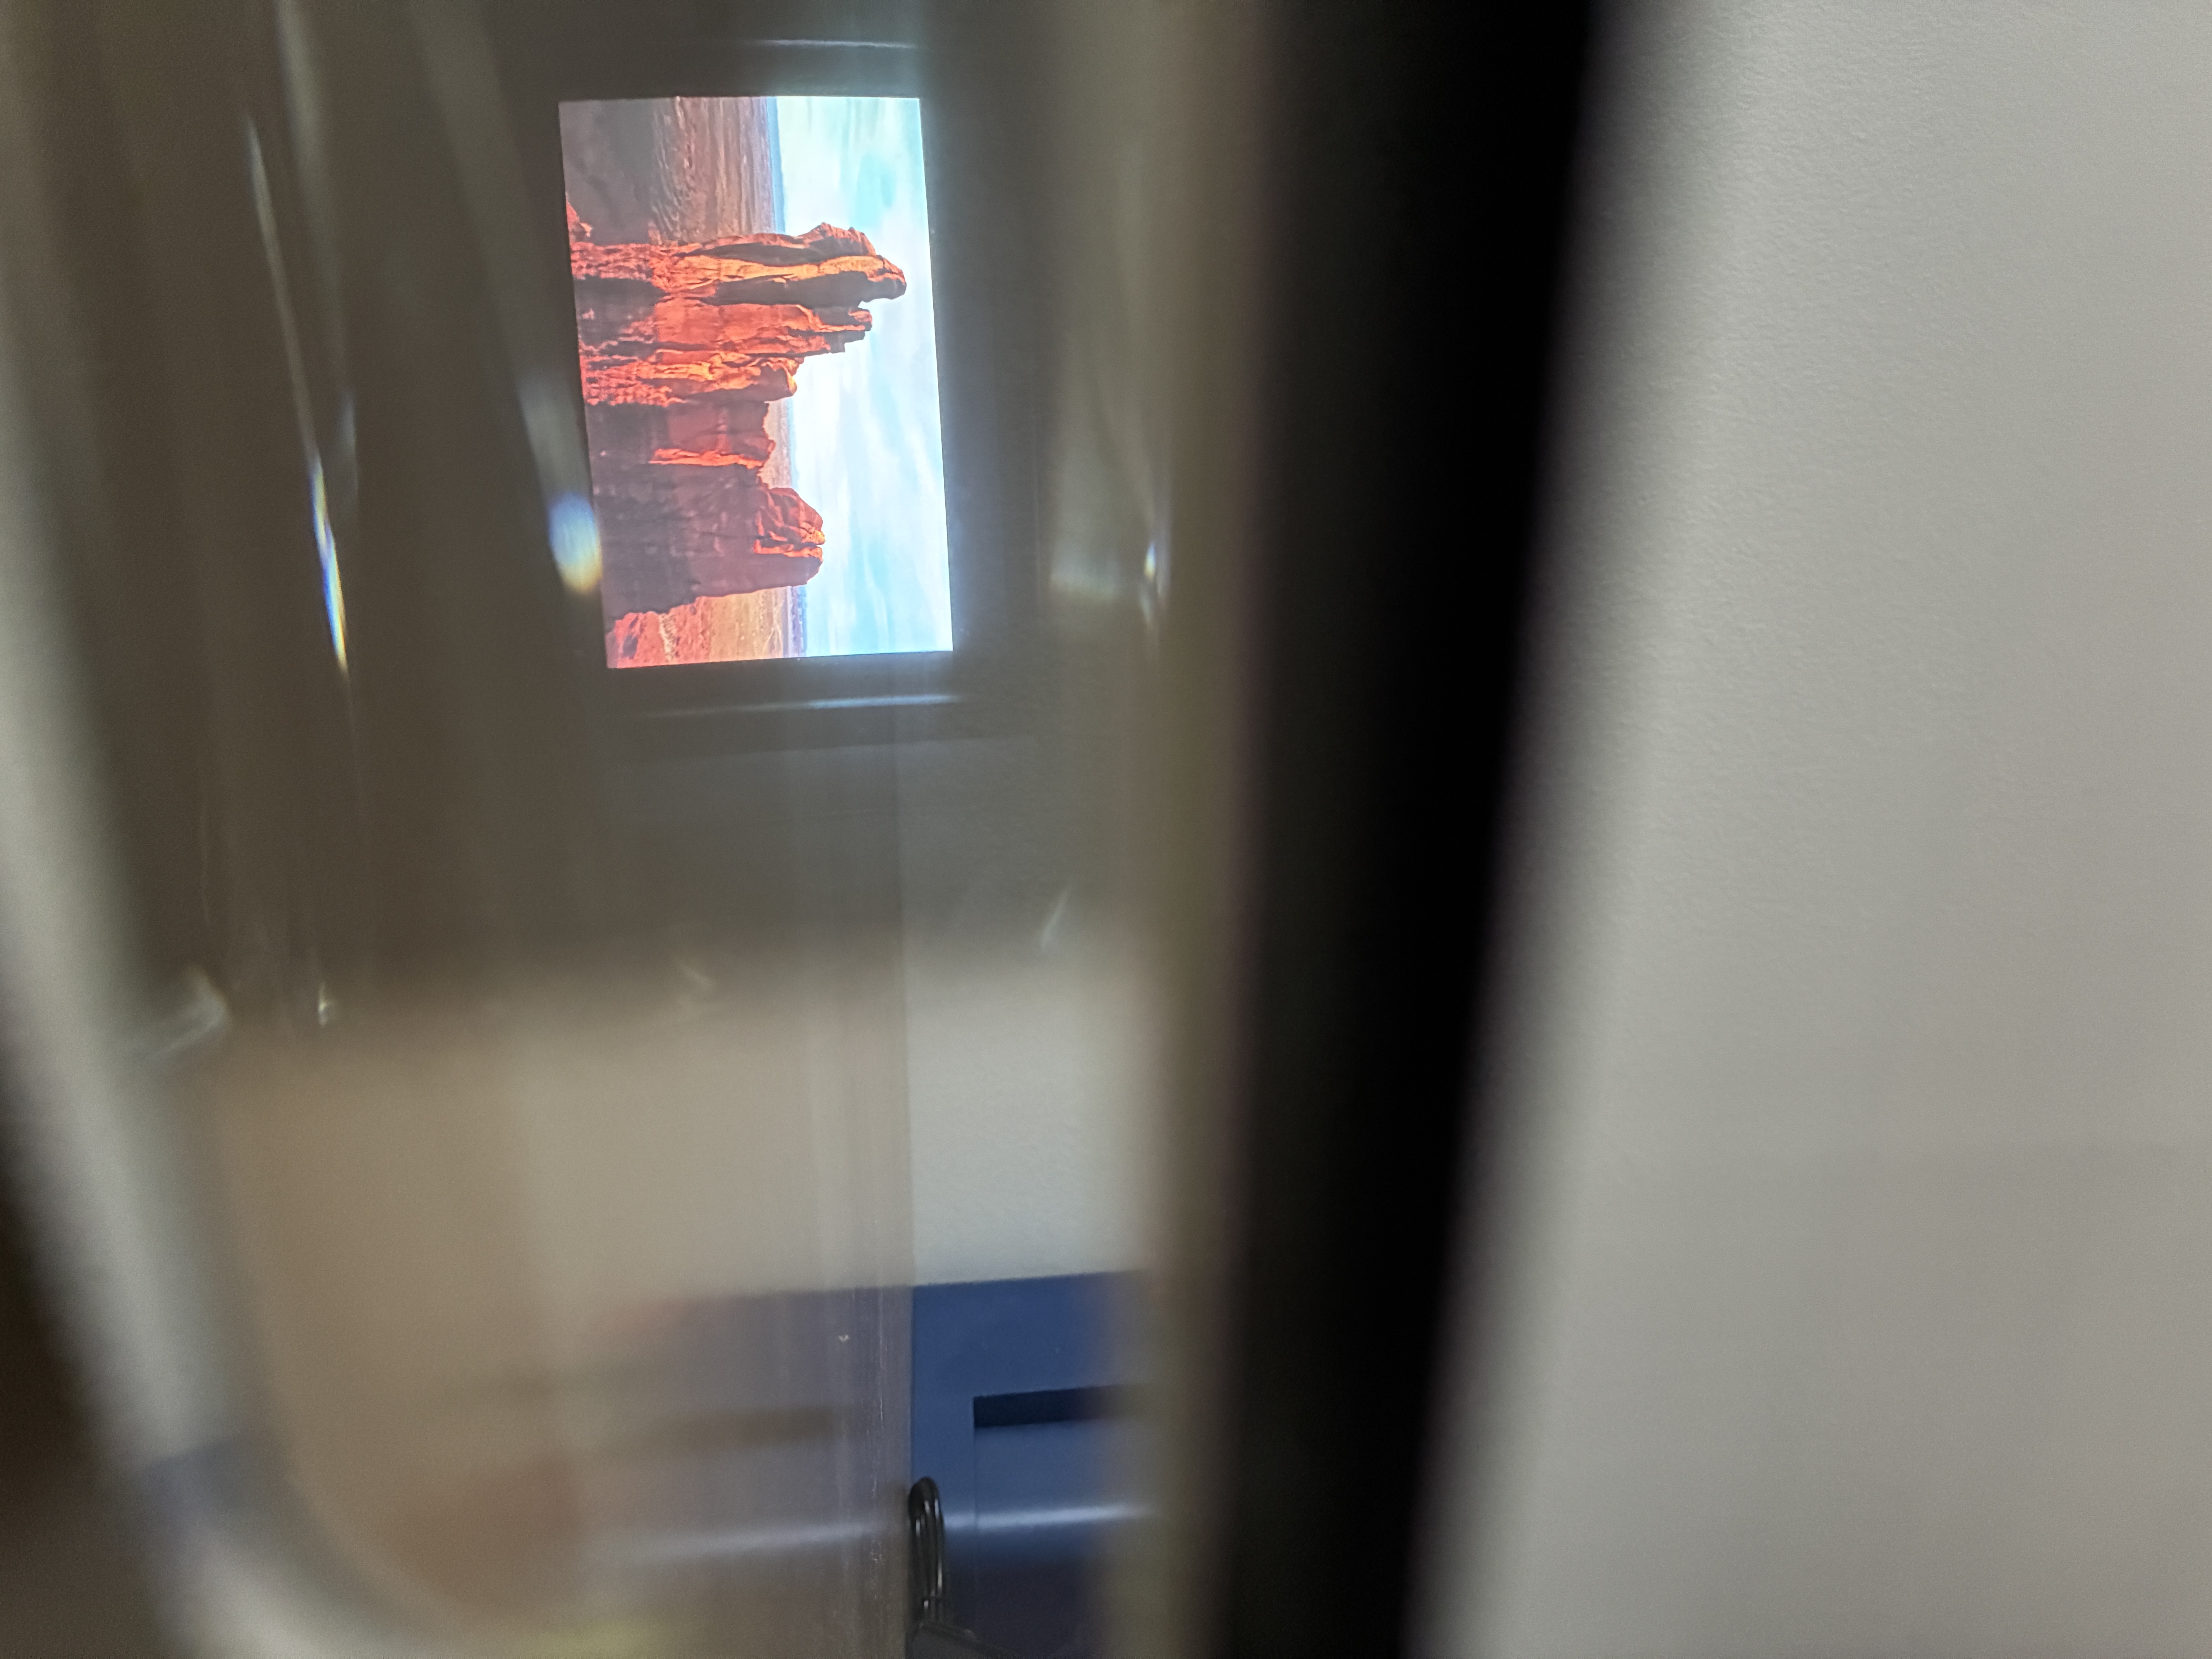
Demo:
Capabilities
- 1024 x 768 HD Screen
- Full Linux OS
- Portable (Pocket Sized) Power and Computation Module
- Navigation HUD via Phone Bluetooth
- Custom Software to Watch Movies and TV/YouTube
- Future Camera Integration
Background
I have always thought that having a pair of Augmented Reality glasses would be a great tool for everyday life. It makes me quite sad that the Google glass never took off and that the Meta Rayban glasses has no screen despite being called smart(!?!). From learning an instrument to navigating while driving, having a heads-up display (HUD) seems really useful for all sorts of tasks. With some spare time during my summer 2025 internship, I decided to build my own pair of AR glasses to hopefully bring my dream device to life.
Overview and Components
The heart of this build is the optics necessary to overlay a crisp image over normal vision. It is not enough to just place a transparent screen on top of a pair of lenses since the focal length of the enviroment and screen would be completely different, causing blurryness and visual strain. The two conventional solution to this problem are prism based displays and waveguide based displays. Prism displays offer a wider field of view (FOV) and easier construction in exchange for a bulkier frame. However for my use case, I want to display a very minimal amount of information while keeping the footprint small, making waveguide optics the preferred choice.
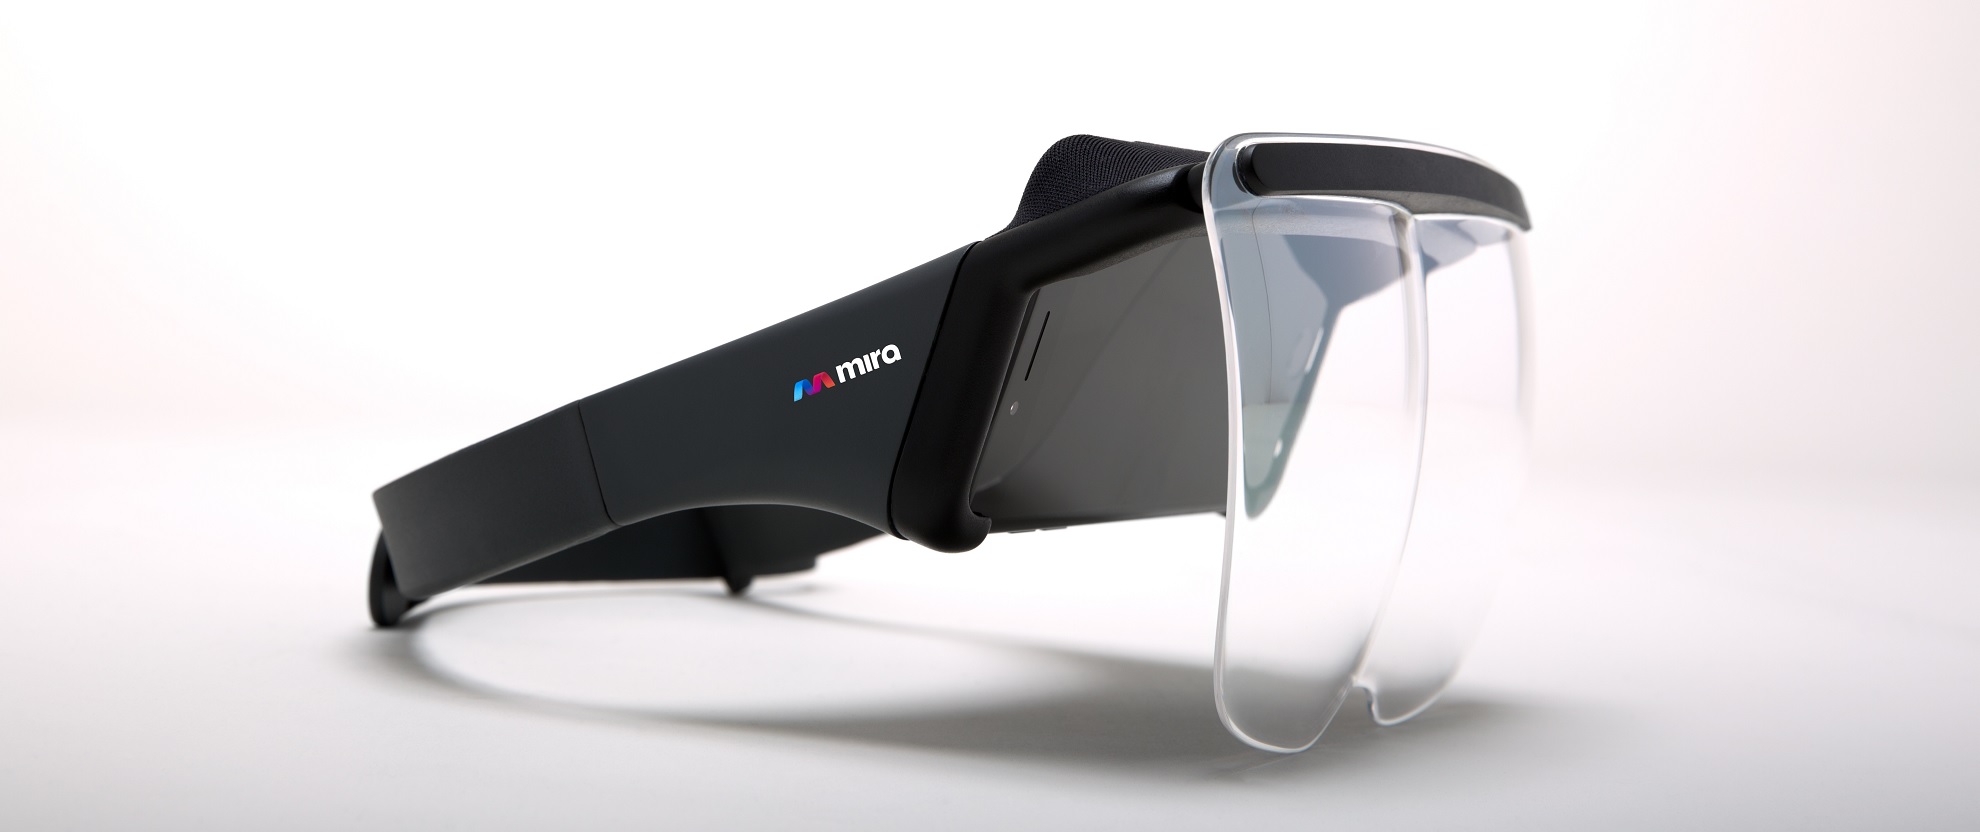
Google Glass (waveguide) vs Mira (Prism)

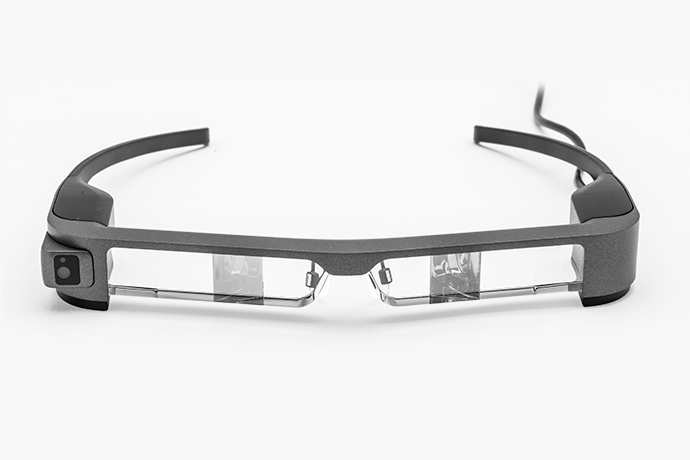
Moverio BT-300 Smart Glasses
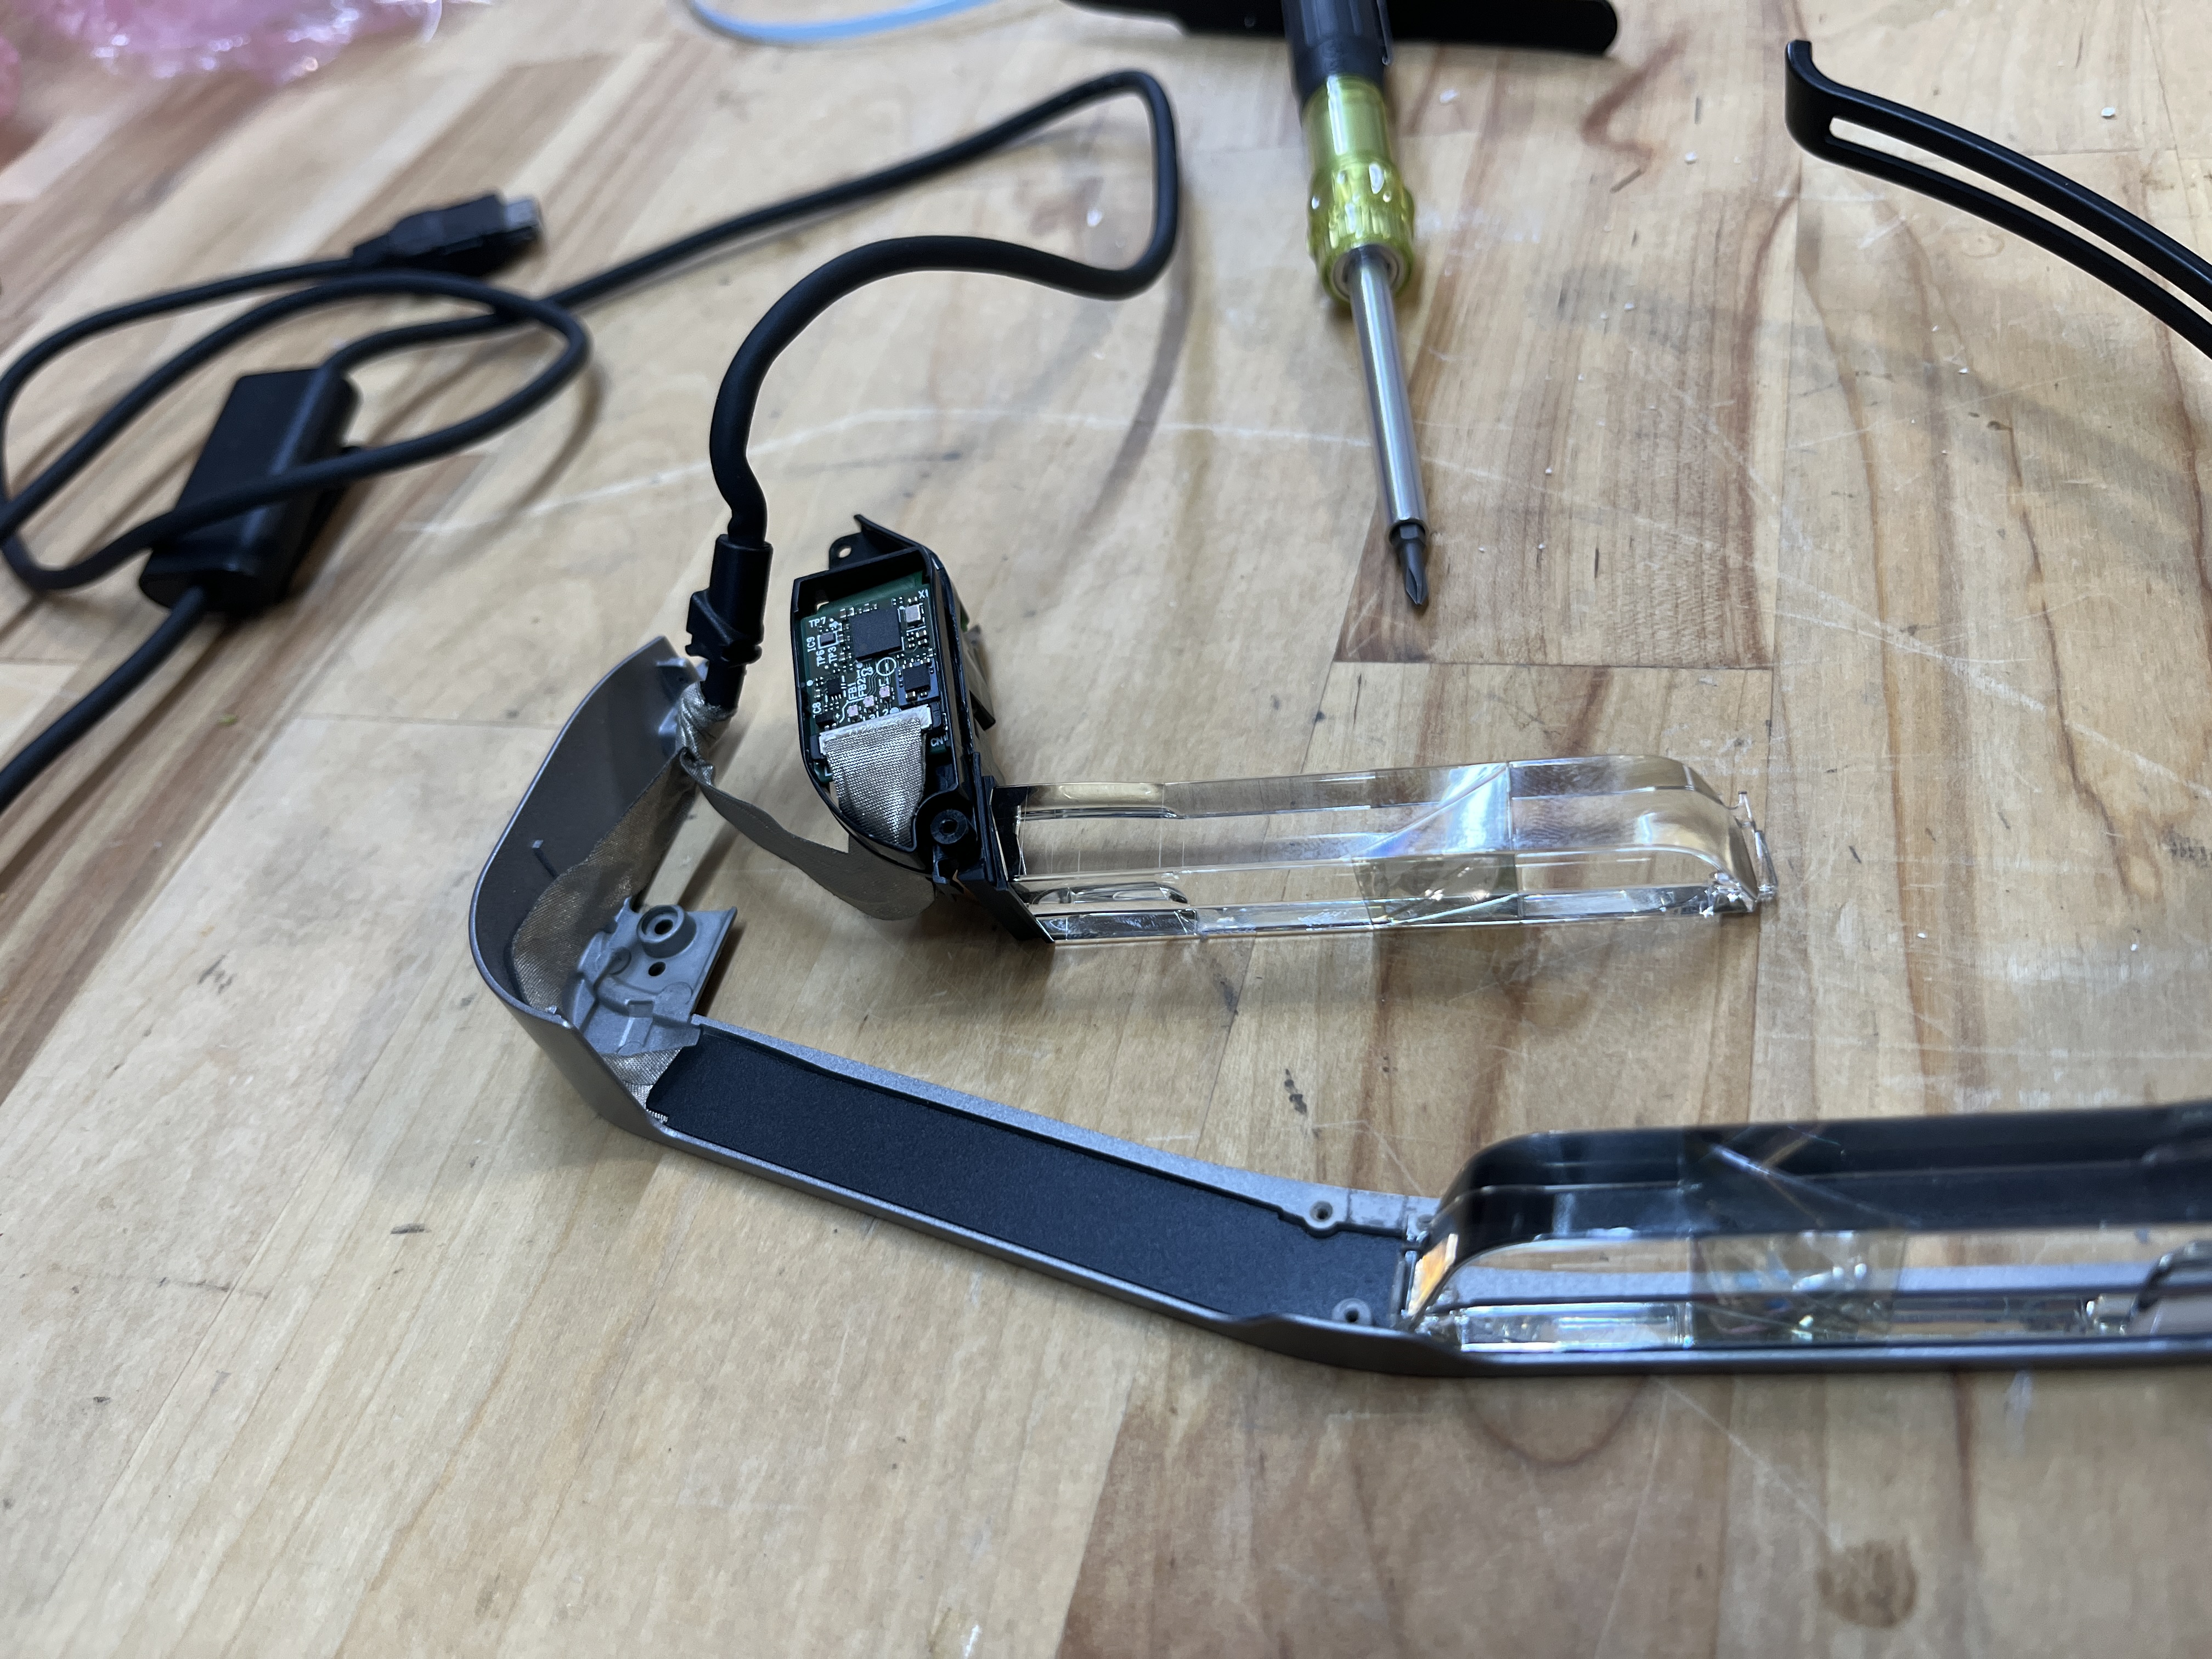
Constructing custom optics is outside the scope for this project and would result in worse quality images in comparison to pre-existing products on the market. This is the reason I chose to disassemble a pre-existing pair of waveguide glasses, the BT Moverio-300. Epson created this pair of AR glasses back in 2016 that were incredibly ahead of its time; the screen has great resolution and the power bank and compute is surprisingly slim, even for today’s standard. However the Moverio-300 runs custom software and firmware which is notoriously hard to alter. Since I wanted this to be a mechanical project with a side of electrical engineering and software, I decided not to mess with the firmware and just repurpose the optic module with my own screen and computer.
Internal Optics
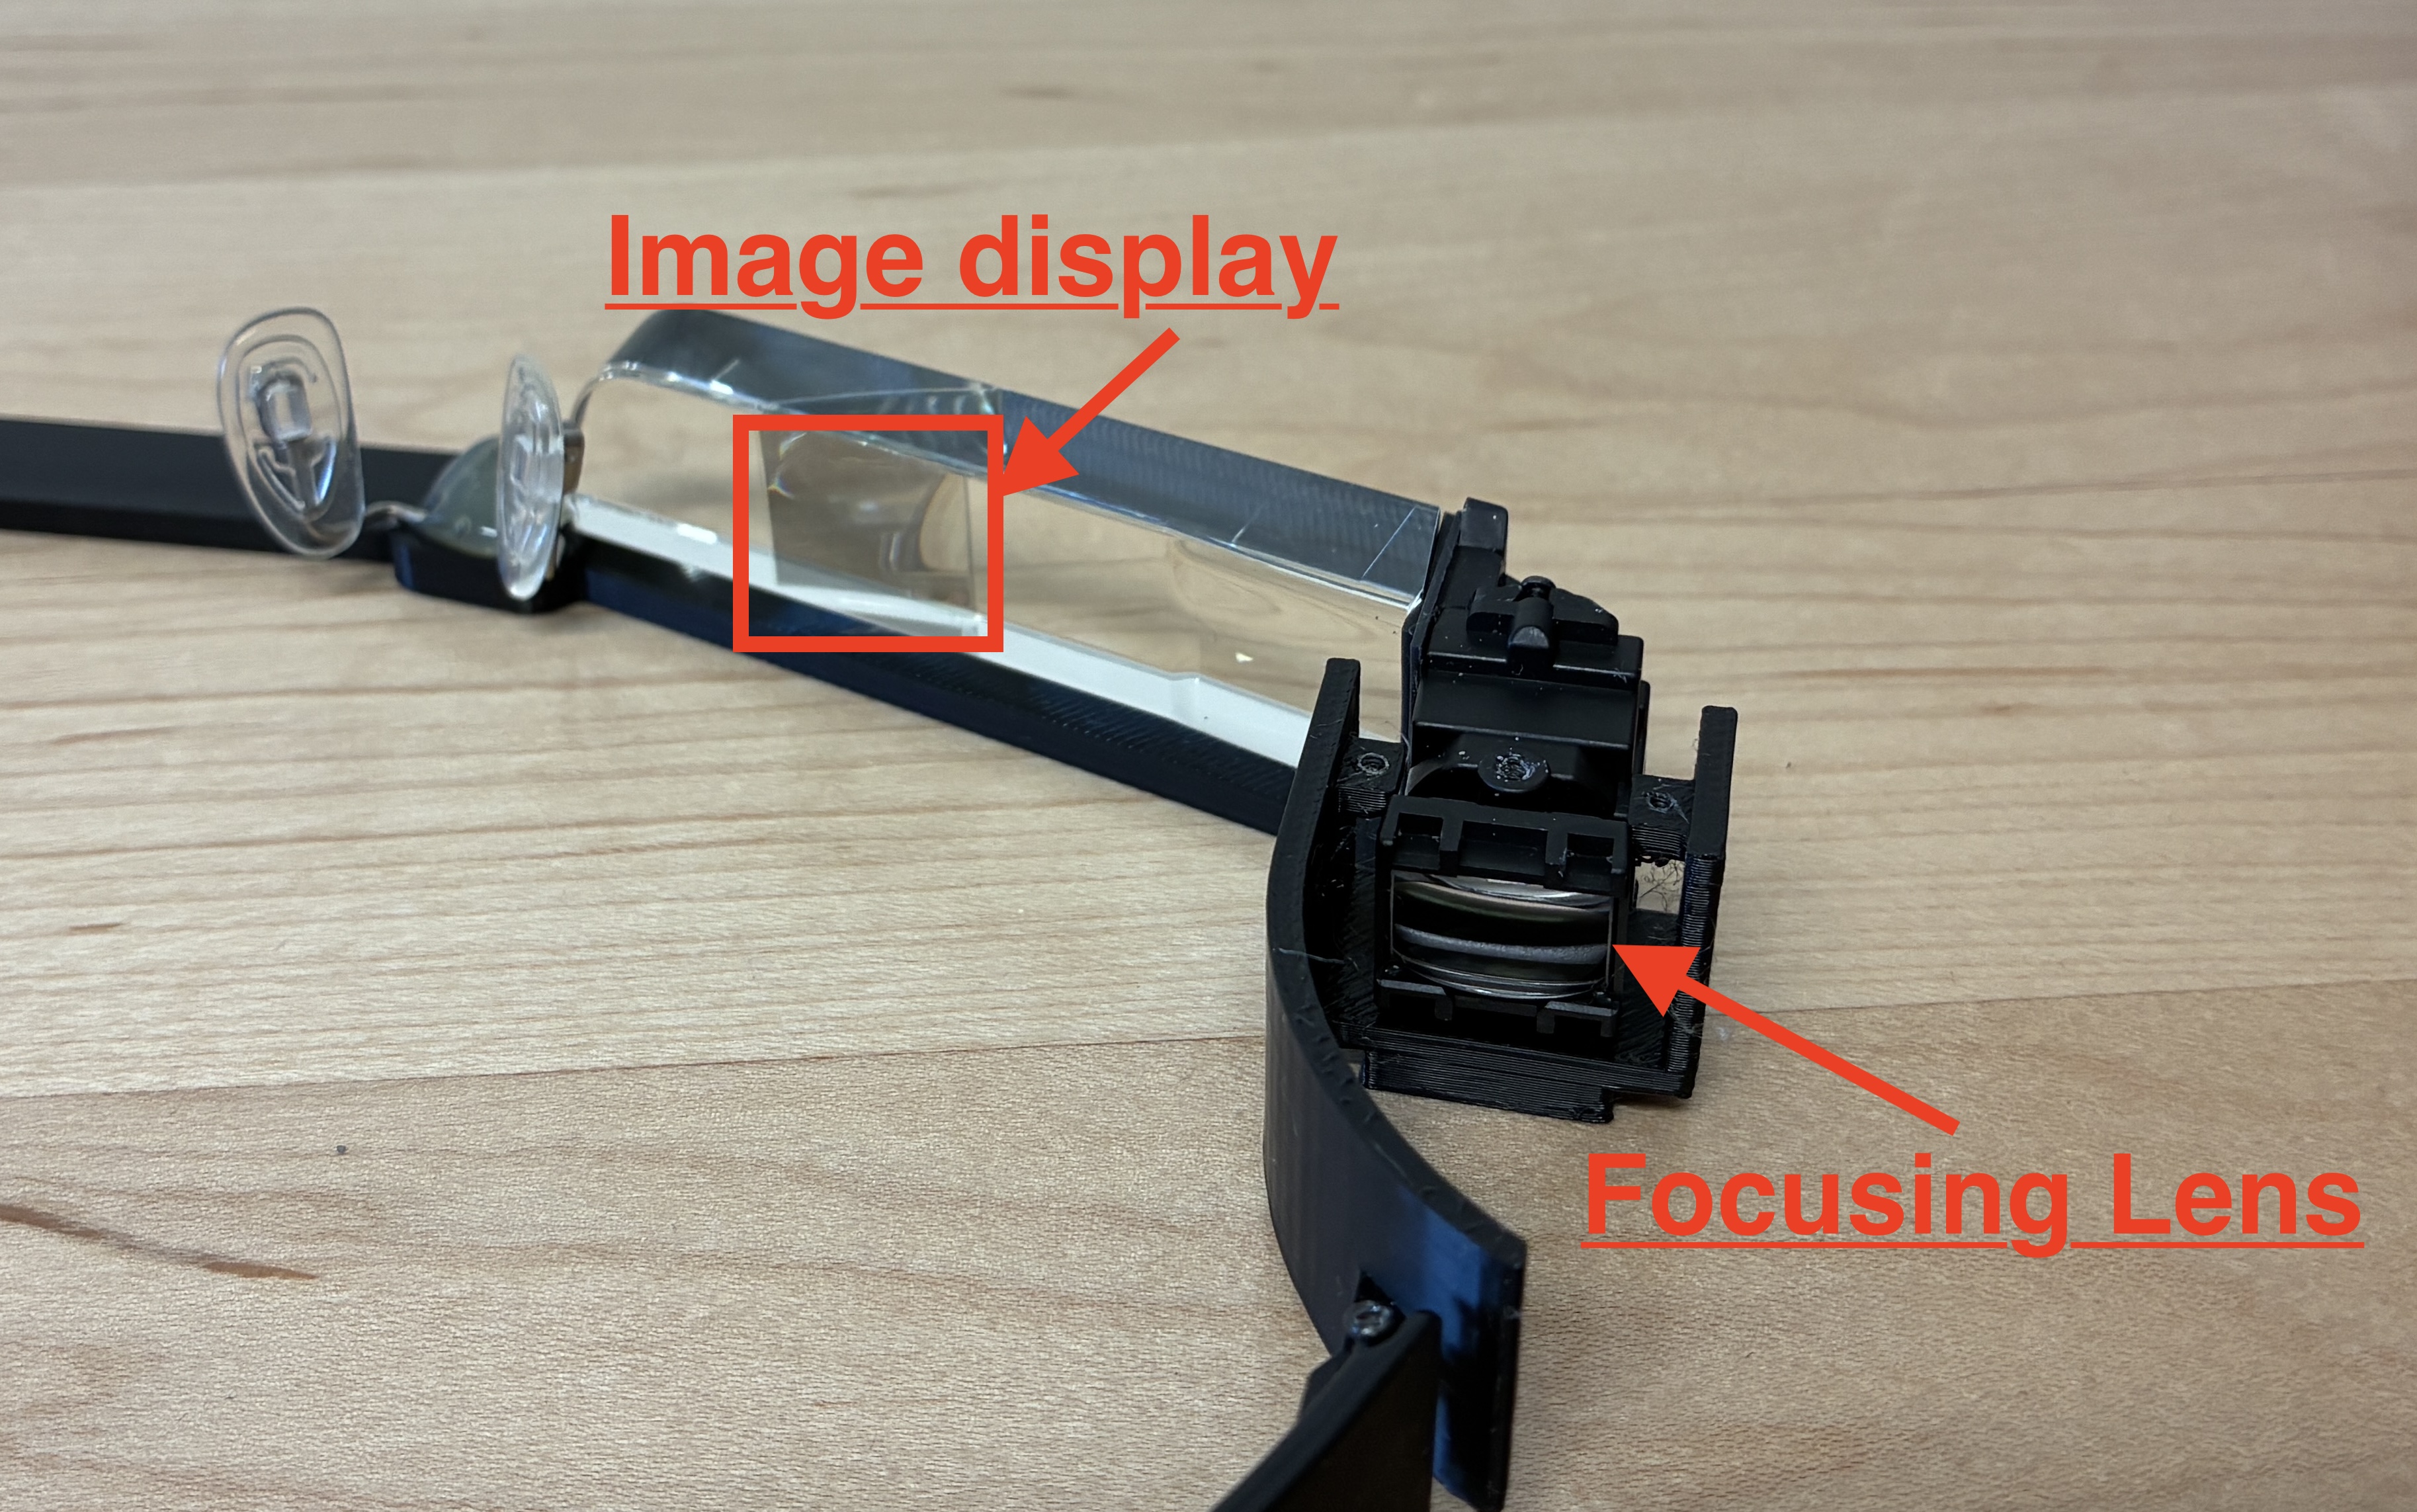
Original Glasses
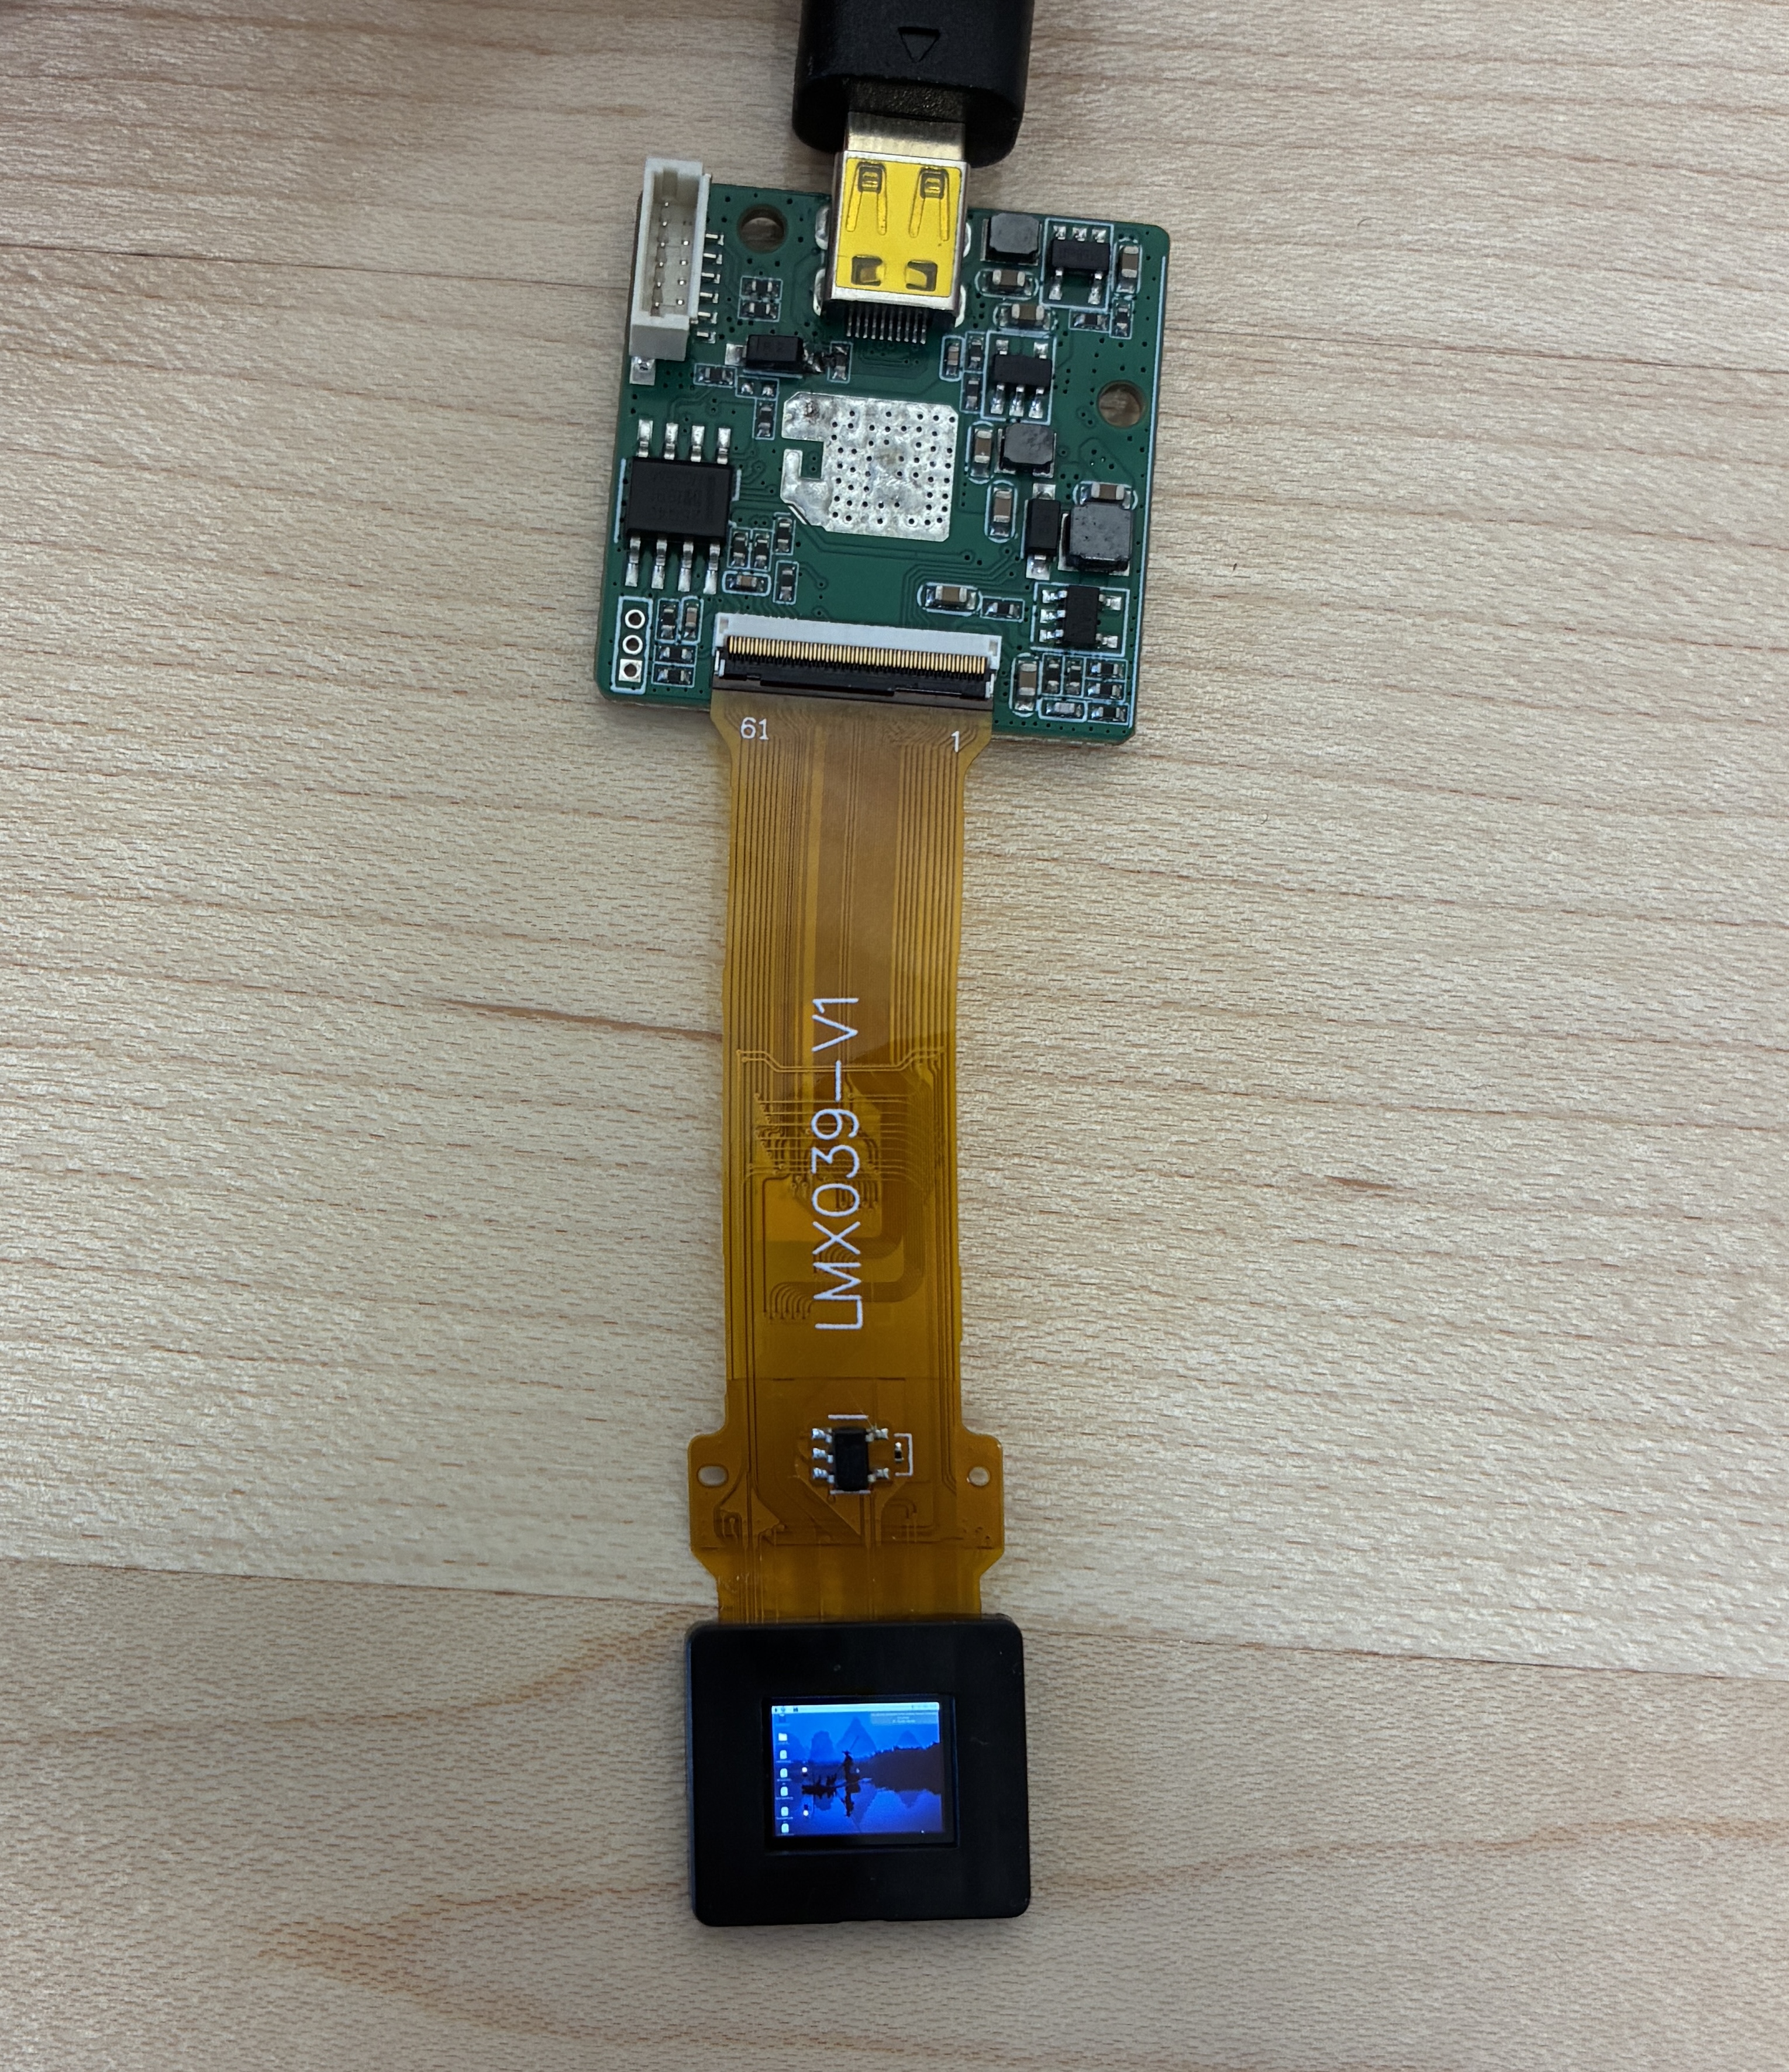
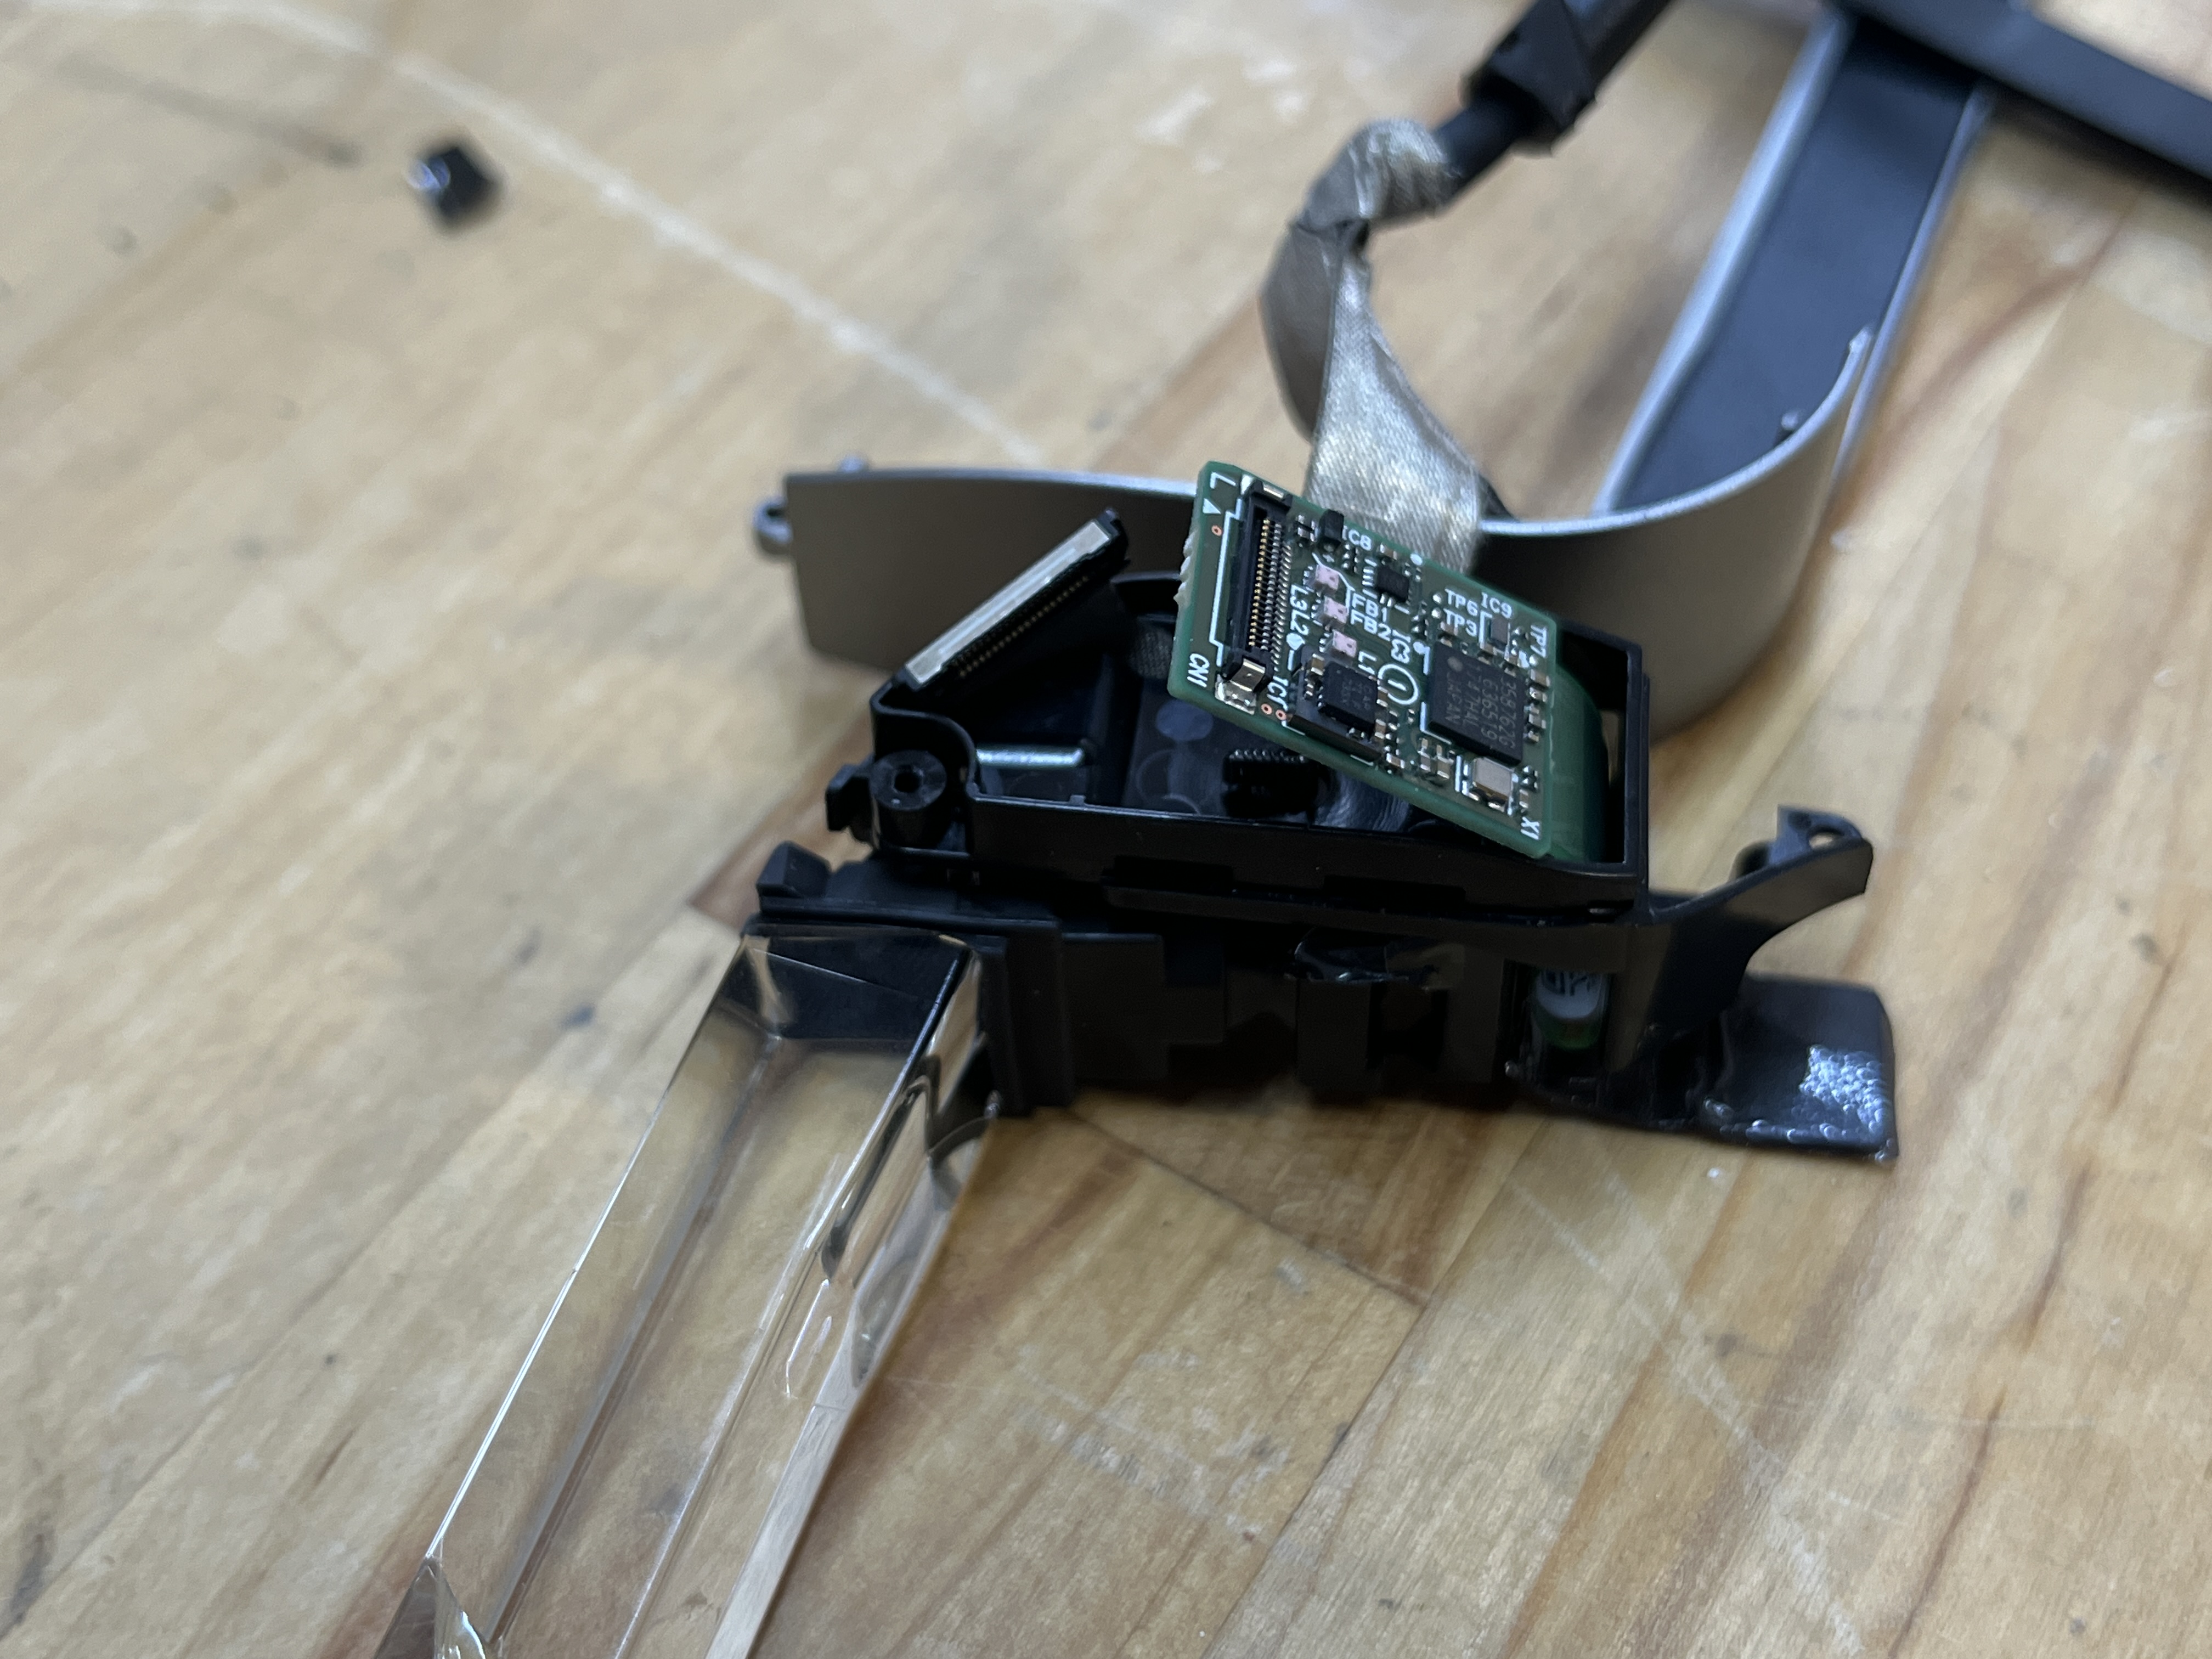
ECX333A OLED Display
This micro OLED display is only about 0.39 inches across but don’t let it’s size fool you; the price for the screen was more than the rest of this build combined. With a screen size smaller than a pinky nail, the ECX333A displays high quality video right out the box with a very conveniant micro HDMI port. I did have to fiddle a bit to find the optimal focal point between the optics module and the screen, but after that, it managed to display crisp images on the glasses.
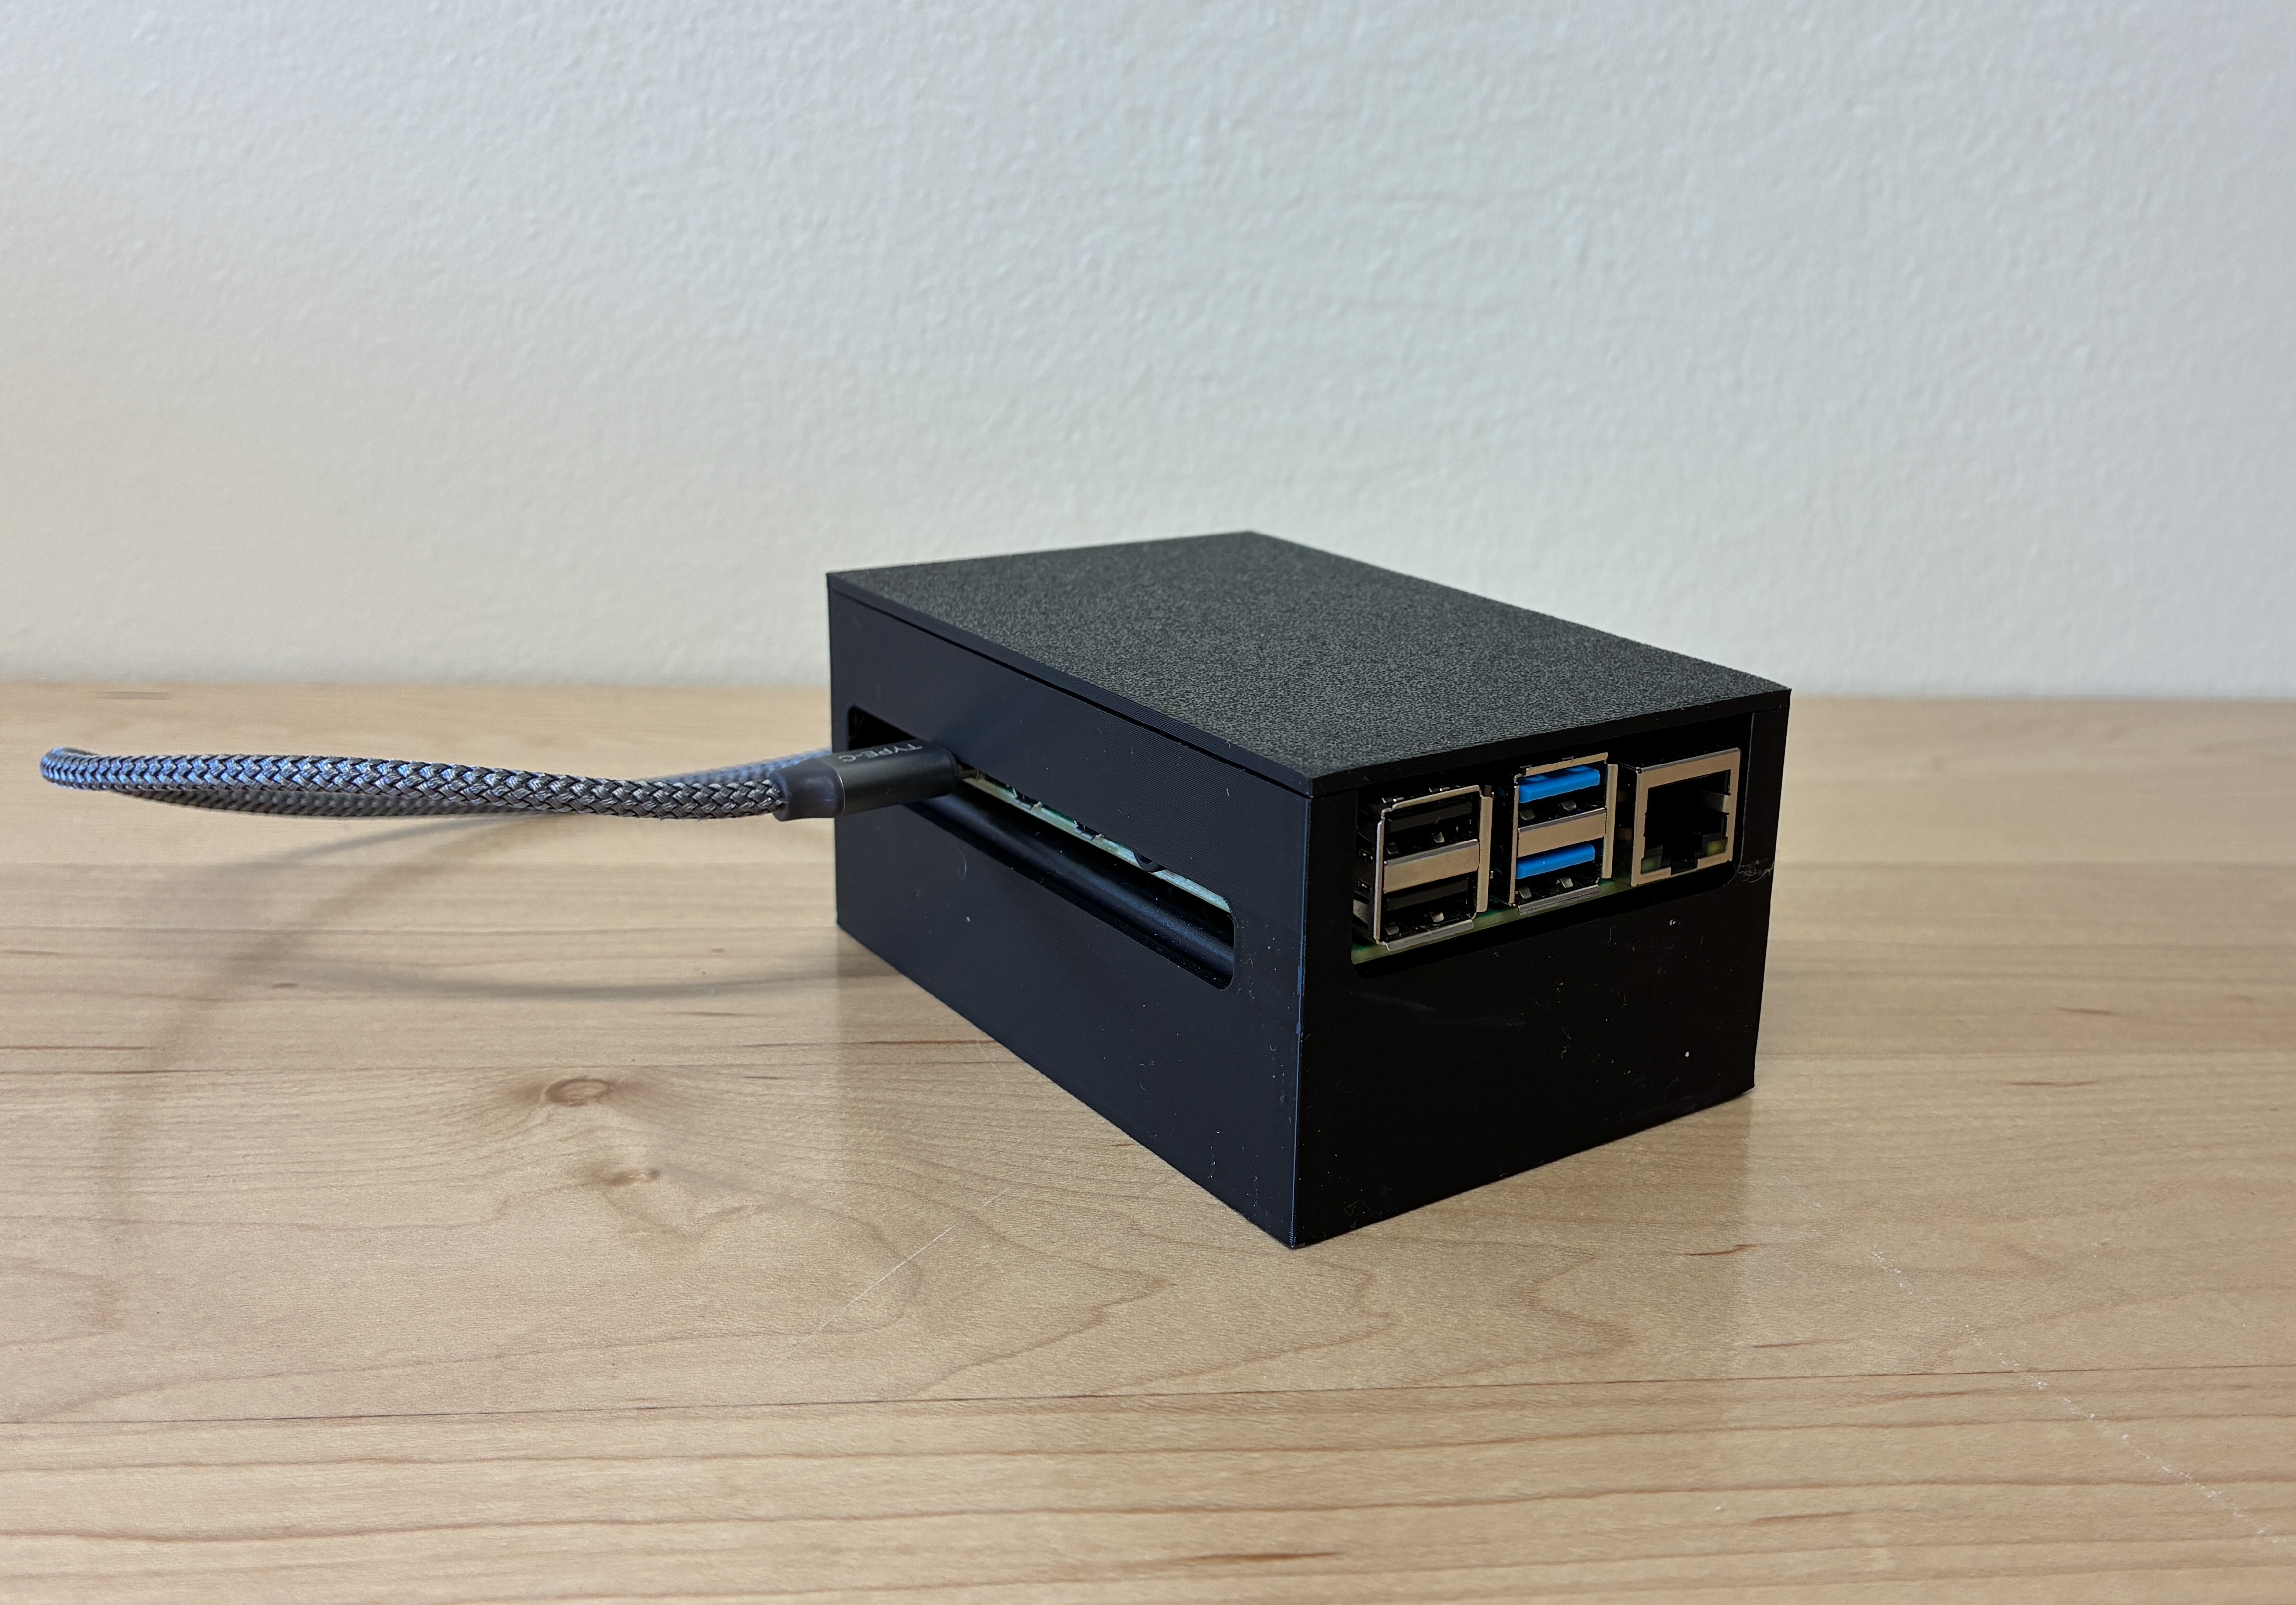
Raspberry Pi and Power
This project uses a Raspberry Pi 4B to run all the software on the glasses. I think this is a bit overkill, as a Raspberry Pi Zero is enough to do most of the work, but I had a 4B lying around just asking to be used in a project. The Pi is running the Linux based Pi OS and contains a couple Demo programs I wrote to showcase the technology. Internet connection is acheived through a Wi-Fi hotspot on my phone which works surprisingly well while out and about. An accompanying 3000mAh battery pack is used to power the Pi and I designed a basic carrying case to house all the components while traveling.
Disassembly
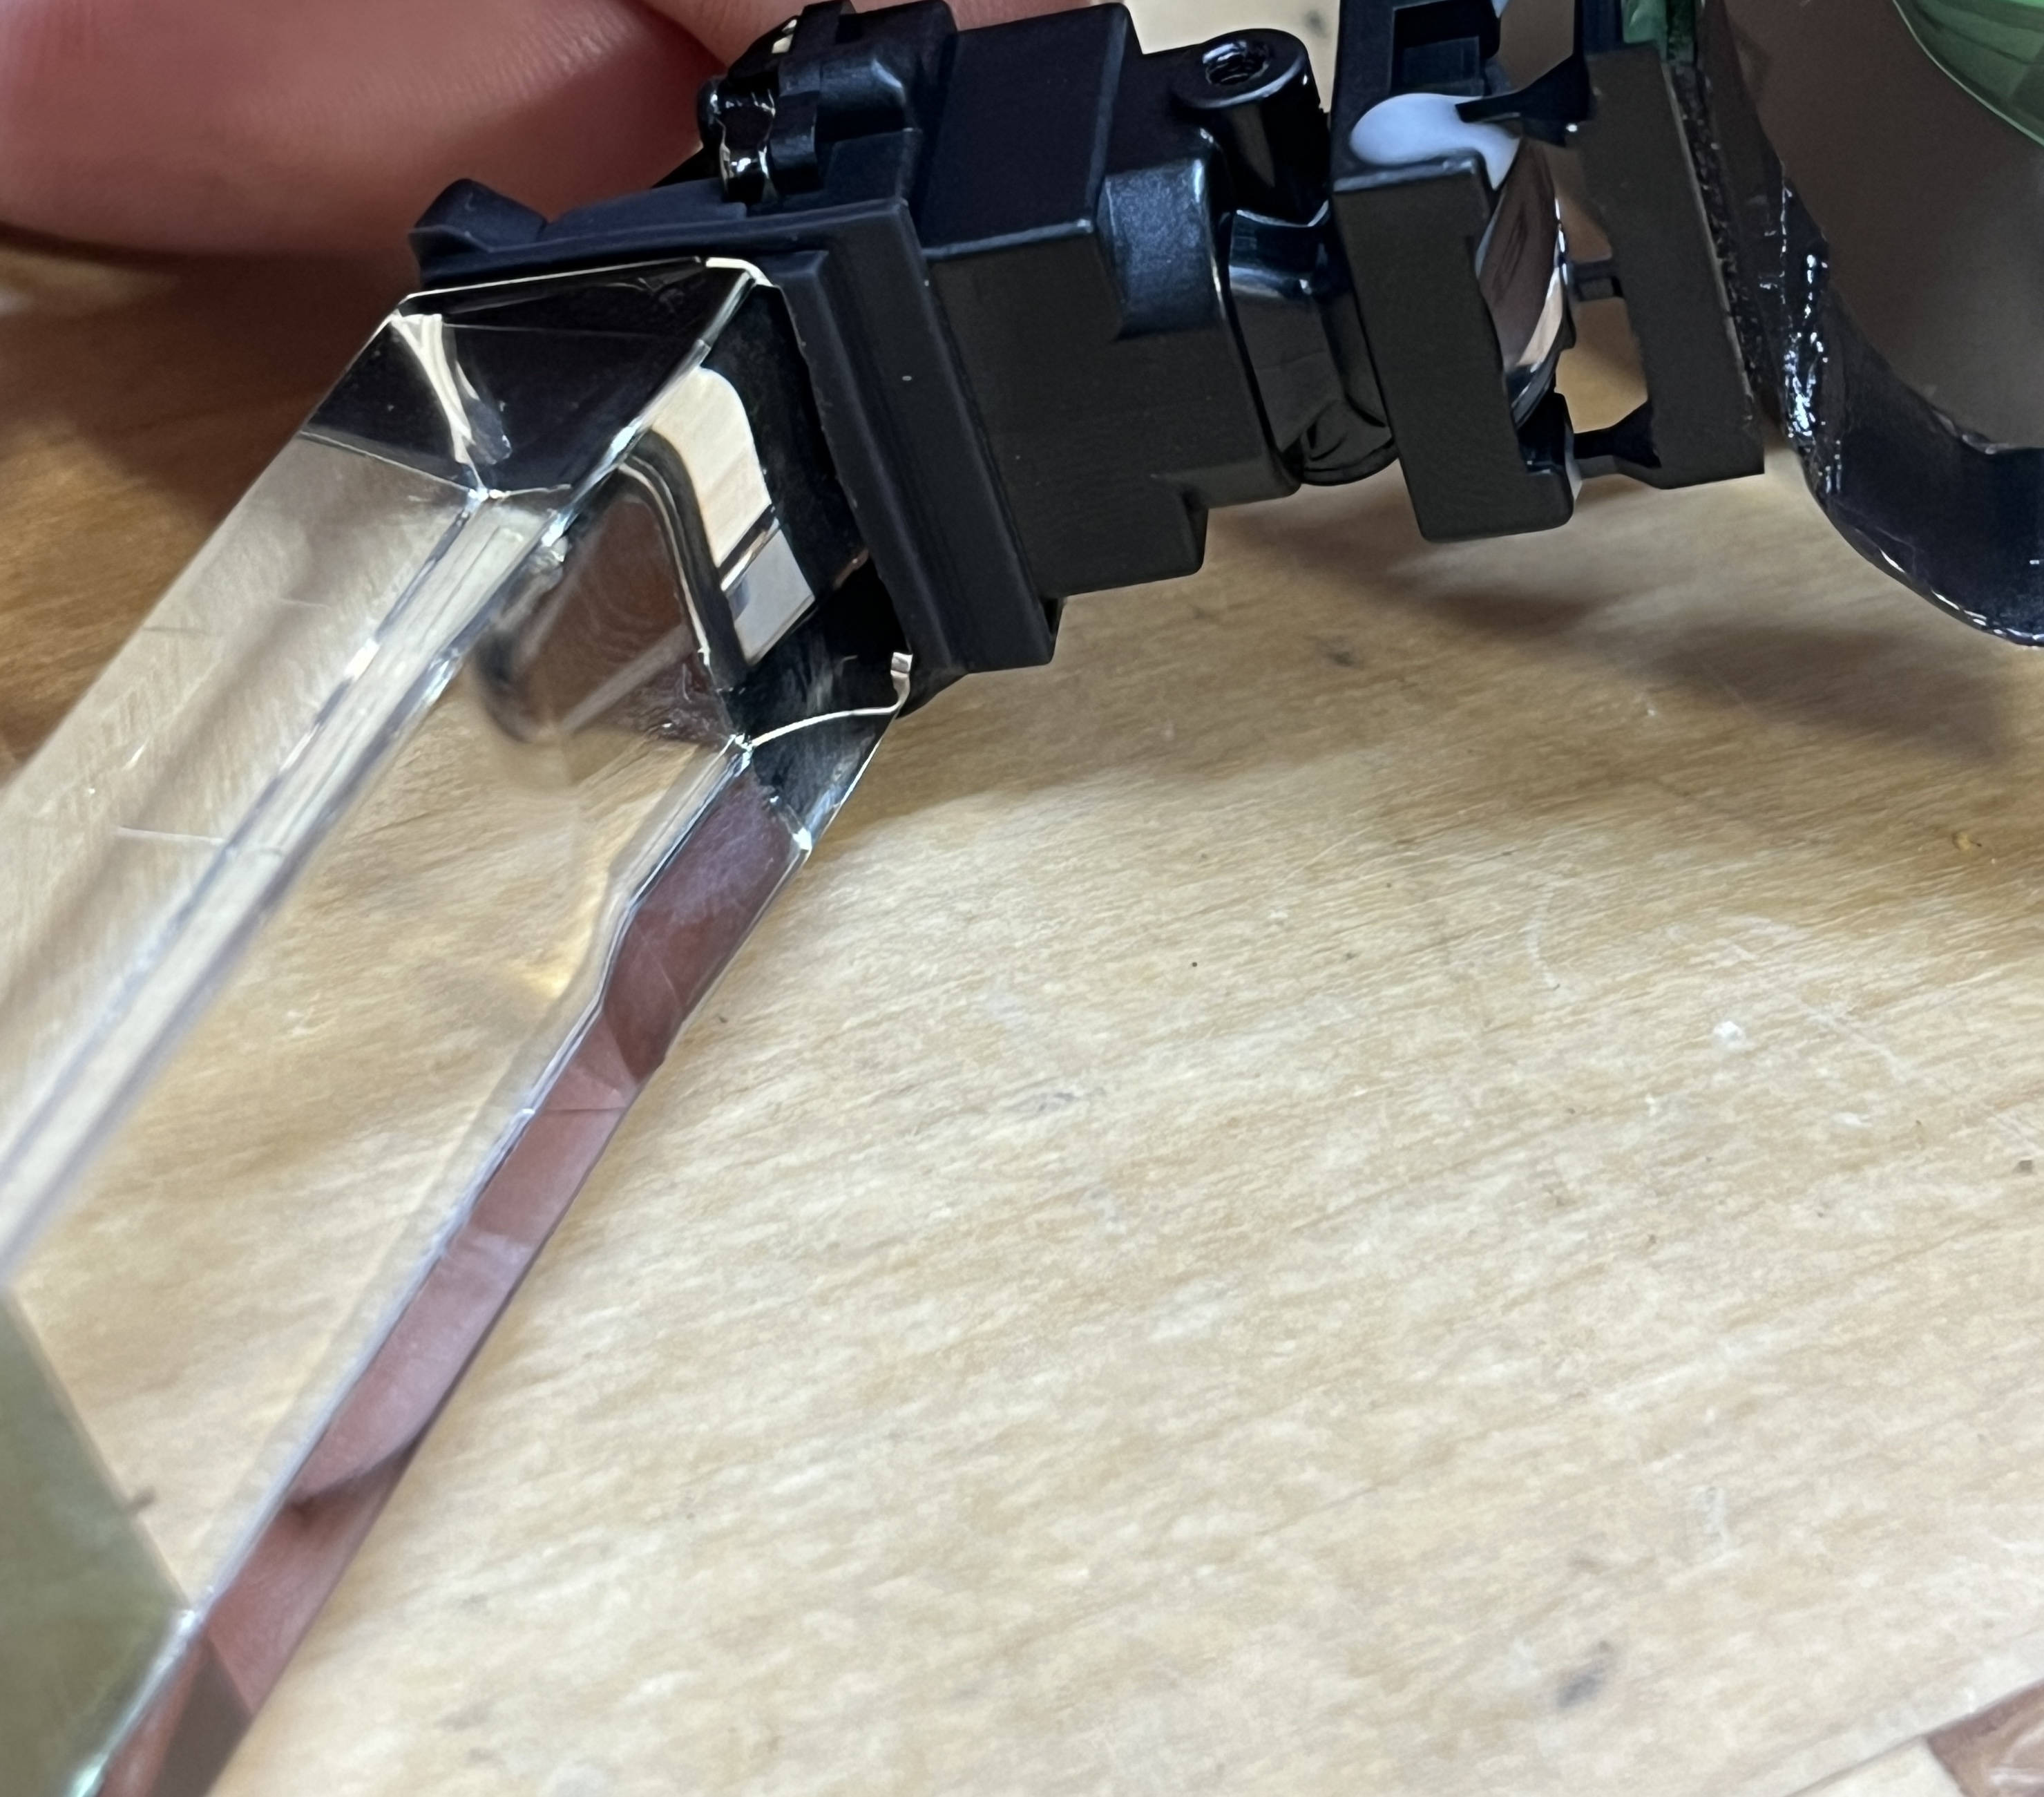
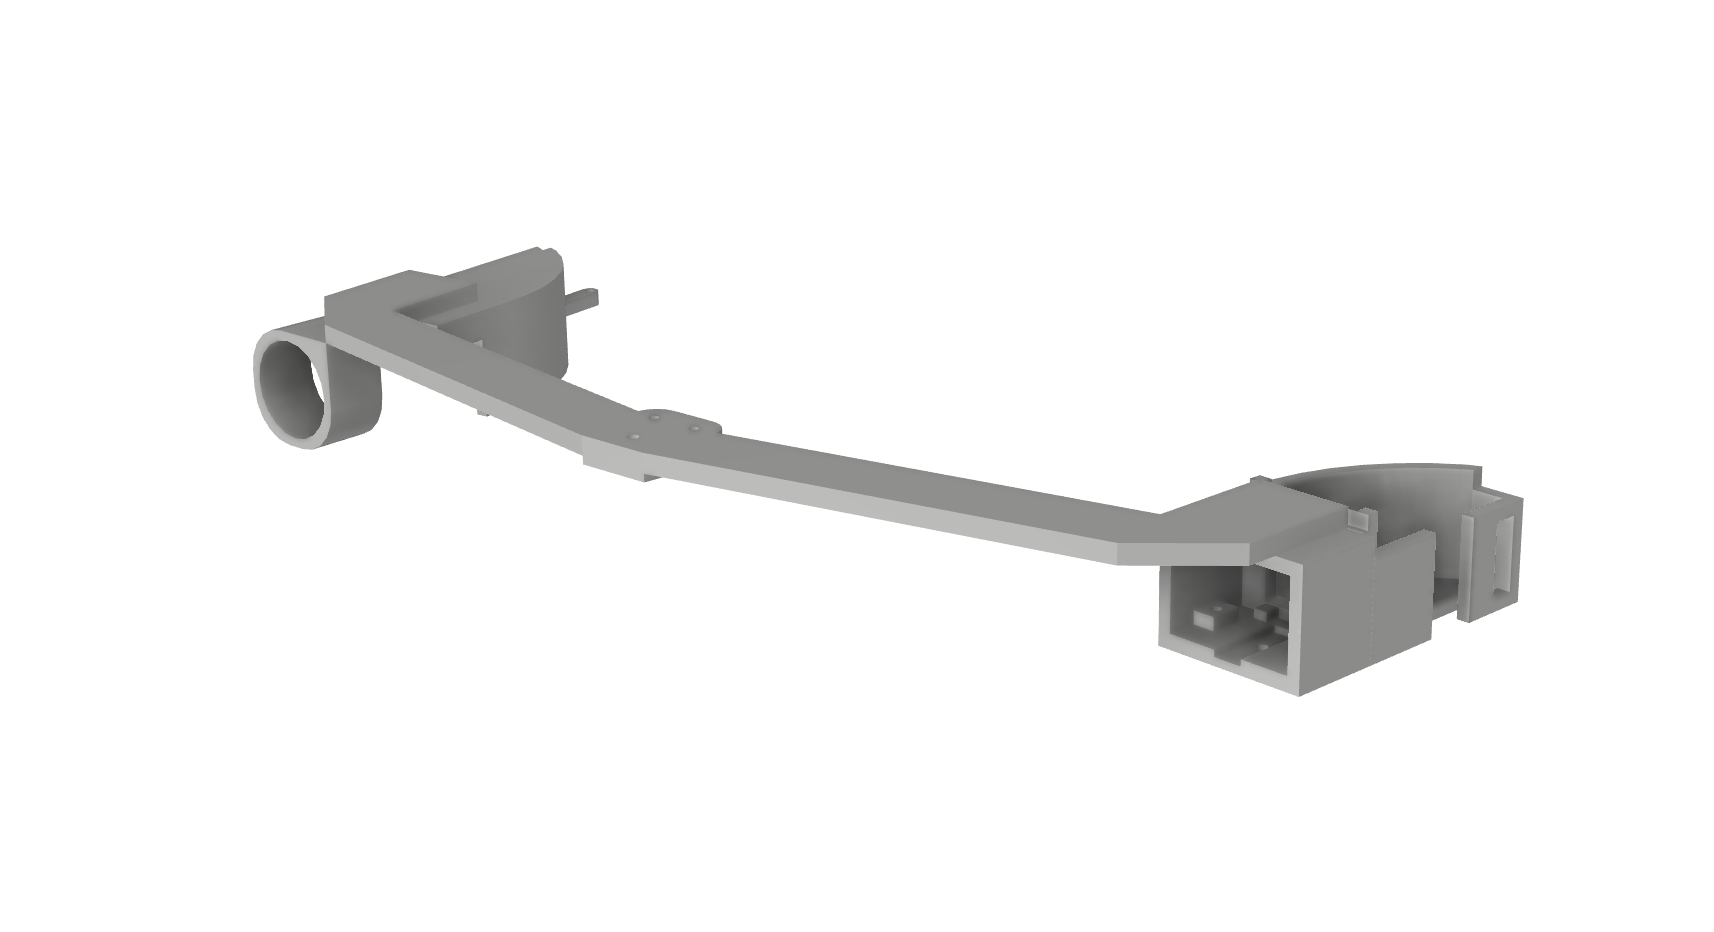
Disassembling the ECX333A was a tremendous learning experience for me to learn about consumer product design. Being careful to not permanently break anything, I peeled back layer after layer of screw, wiring, PCB, and plastic shells to free the focusing lens and mirror. Luckily, the entire optical assembly came out intact and without scraches and even had convenient mounting geometry to make frame designing easier.

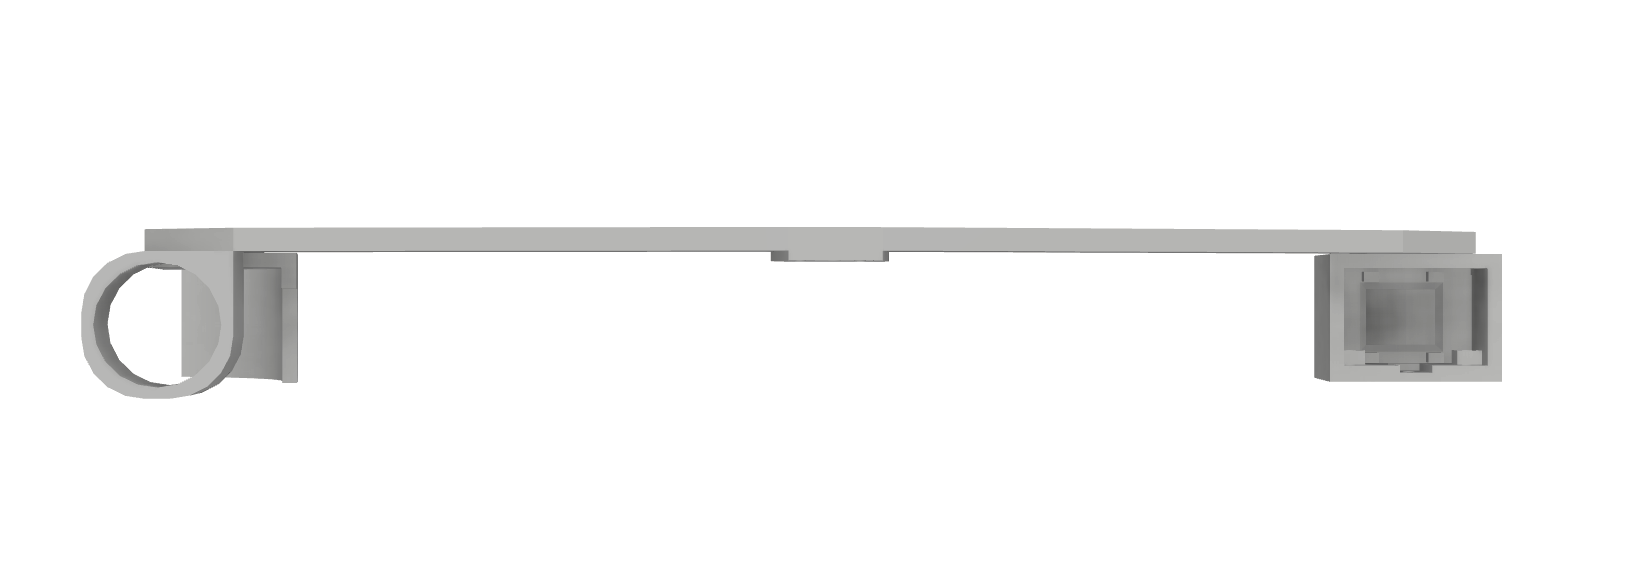
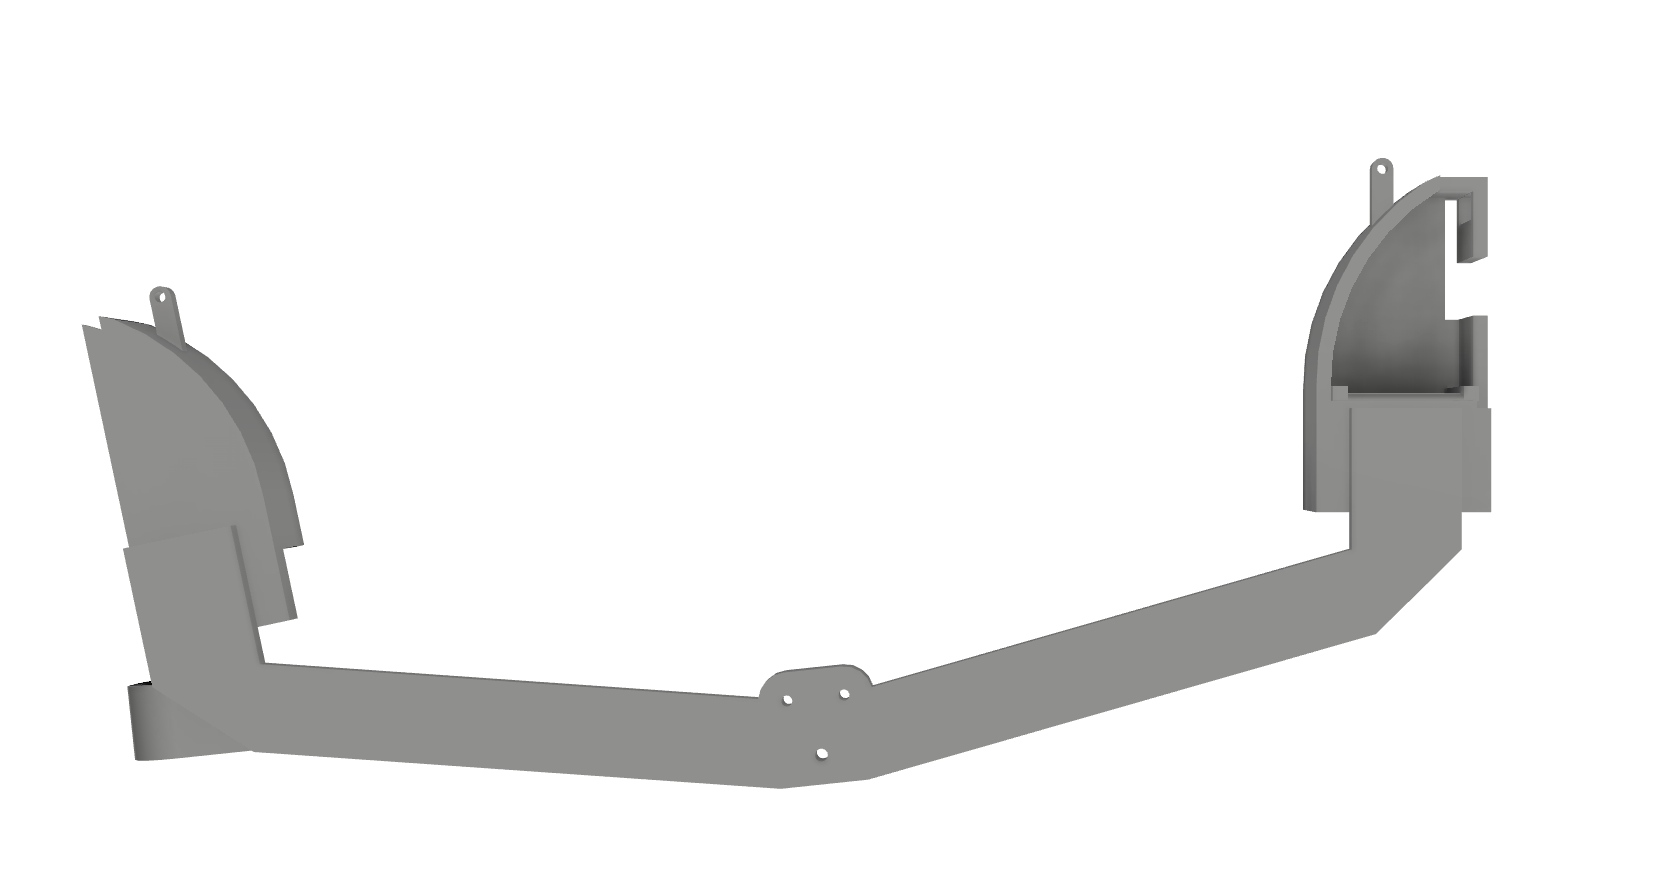
Frame 3D Modeling
When creating wearables that are able to be easily prototyped, I definitly followed the old silicon valley motto: Move fast and break things. The feel and fit of the glasses are incredibly hard to model and measure, so apart from taking a rough measurement of my head diameter, I did a lot of 3D printing to dial in what felt good to wear while also making the product as easy to assemble as possible. For the compute and power supply case, I prototyped a simple box with access ports for the Raspberry pi, but future iterations should slim down the footprint and prettify the design.
Software
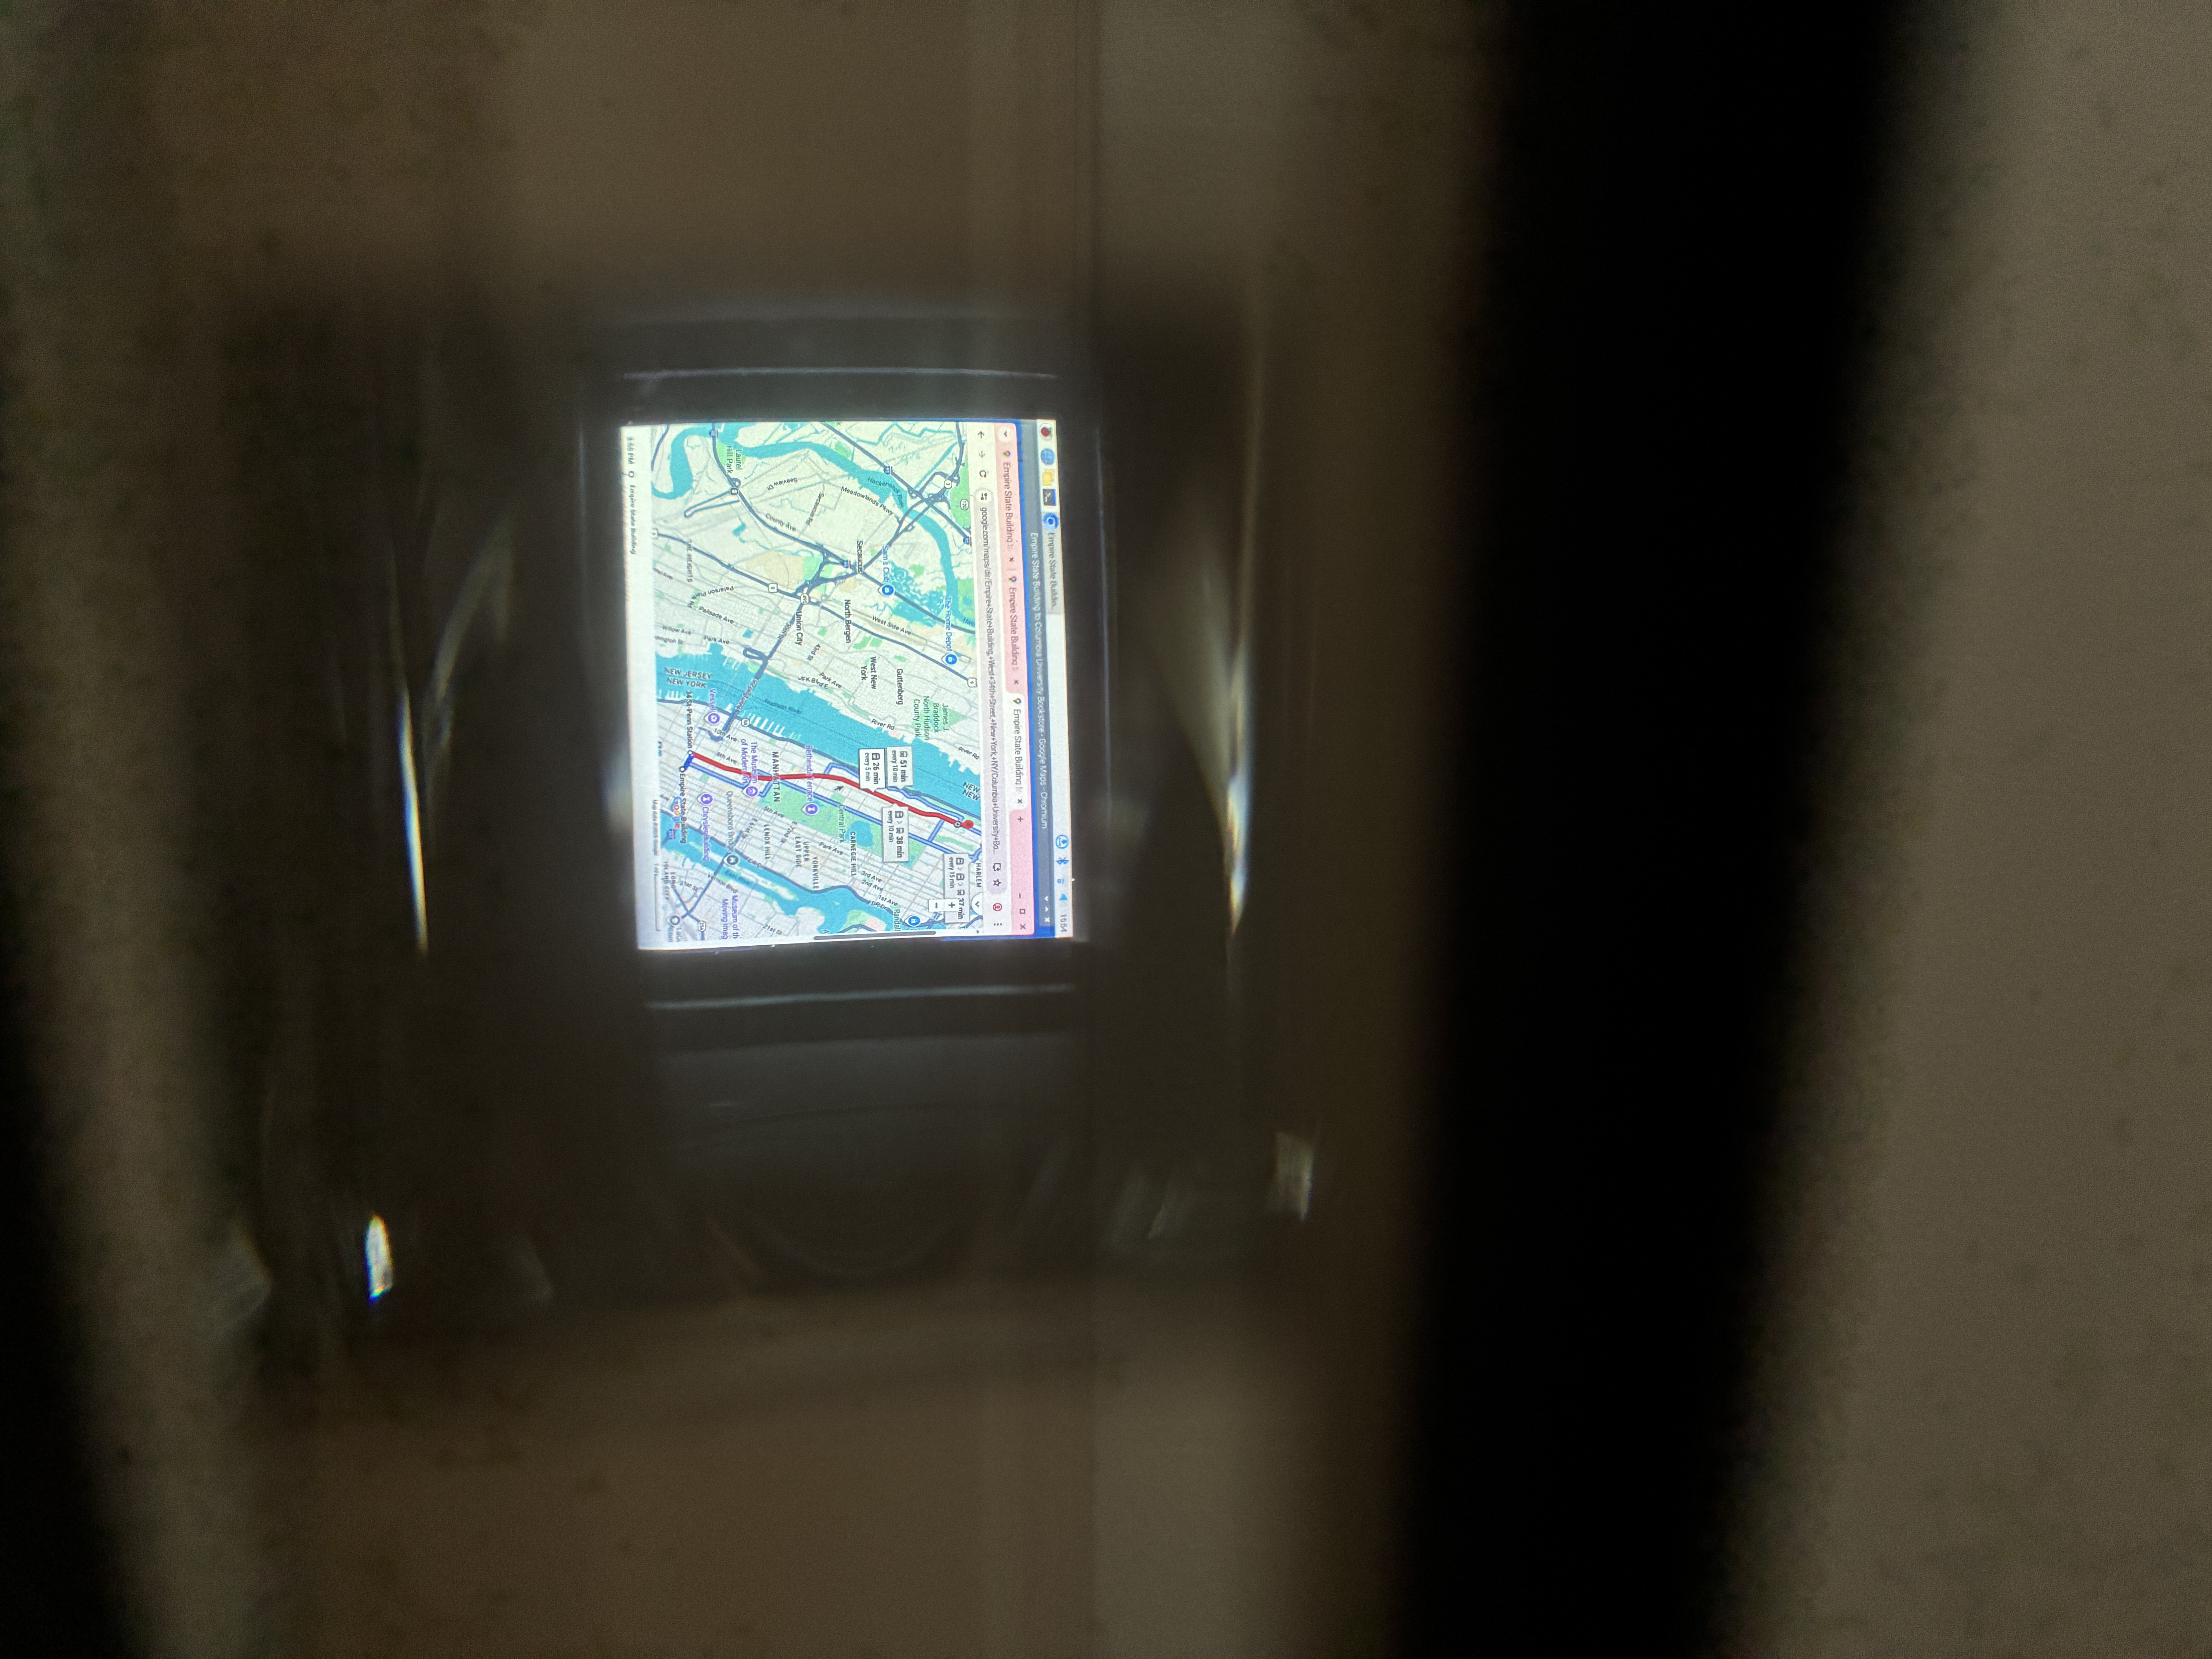
This is mostly a hardware demo, but I would be remiss if I didn’t write a least a little bit of code to showcase the potential of these glasses. As an avid YouTube watcher, I utilized the YouTube API to gather all of the user’s subscriptions and to pick a recently uploaded video to display. Selenium then opens a chrome window to play the designated content and once finished, another video is then queued. More practially, I designed a navigation HUD for Google Maps to aid the user while driving. Looking at the phone for navigation for even a moment presents safety concerns, especially while driving on the highway. By overlaying the instructions on top of the driver’s vision, they can keep 100% of their vision on the road while simultaneously checking their map.
Conclusions and Future Work
This project is still far from practical and needs work on both the hardware and software side. A large element I glossed over is input and interaction with the glasses. I have plans of developing a companion smartwatch (similar to an apple watch) to control a cursor and to stop and start the custom software. Additonally, there needs to be a much larger library of software, and a lot of very interesting applications such as sports or music learning overlays can be developed. However, I think this is a great first step and is a cool hardware demo to prove the potential of wearable AR devices.